
Thanks so much to Flyer and volunteer dev @Krzysztof Kruk for bringing a bunch of amazing new features to FlyWire!
This post will act as a central repository for these addons. Feel free to add as many as you like to FlyWire to improve your proofreading experience!
How to install an Addon
Step 1 Install TamperMonkey
- Go to the TamperMonkey website to download and install TamperMonkey.
- Watch the helpful YouTube video on TamperMonkey’s website, which explains the download process and how to access the TamperMonkey extension from your address bar
Step 2 Install an Addon
- Click the link for the addon you want to install
- Click the “Install” button
- Click the “Addons” button in the lefthand menu on FlyWire (above the leaderboard) to show all addons (click again to disable)
- Active TamperMonkey scripts will be accessible through the chrome extension while using FlyWire. While you are on the FlyWire site you can enable or disable them by clicking the TamperMonkey icon
How to use the dock
The dock houses tools for many addons. It has 3 functional purple buttons, each demarcated with a letter
- O – Organize – Clicking once shows a grid view and allows you to move addons around within the dock. Clicking a 2nd time exits the grid view
- R – Resize – Allows you to input height and width dimensions to resize the dock
- M – Move – Click and drag on the “M” to move the box around
Permanent Colors
Features
- Set 4 favorite colors
- Automatically assign a color to a newly claimed cell
- Selected color stays even when splitting, merging or recoloring
How to use
- Left click a patch to set its color
- Position the axis inside the cell/segment you want to track
- Right-click a patch to start tracking the cell with the clicked color
New cells will automatically inherit any selected color from the addon
Additional details and update log can be found on the discussion board.
Presets
Features
- Save and access preferred settings
- 3 preset environments to switch between
How to use
- Adjust settings to your preference
- Click one of the “Save” buttons to save settings
- Click a number to switch to those saved settings
Suggested uses
- Save the original settings for a link you’re working on
- Save your favorite personal settings
- Save settings appropriate for sharing a link with another party
Additional details and update log can be found on the discussion board.
Restyle
Features
- Changes style elements of the tabs and left menu, including colors, fonts, padding, and allows uniform width of segment IDs
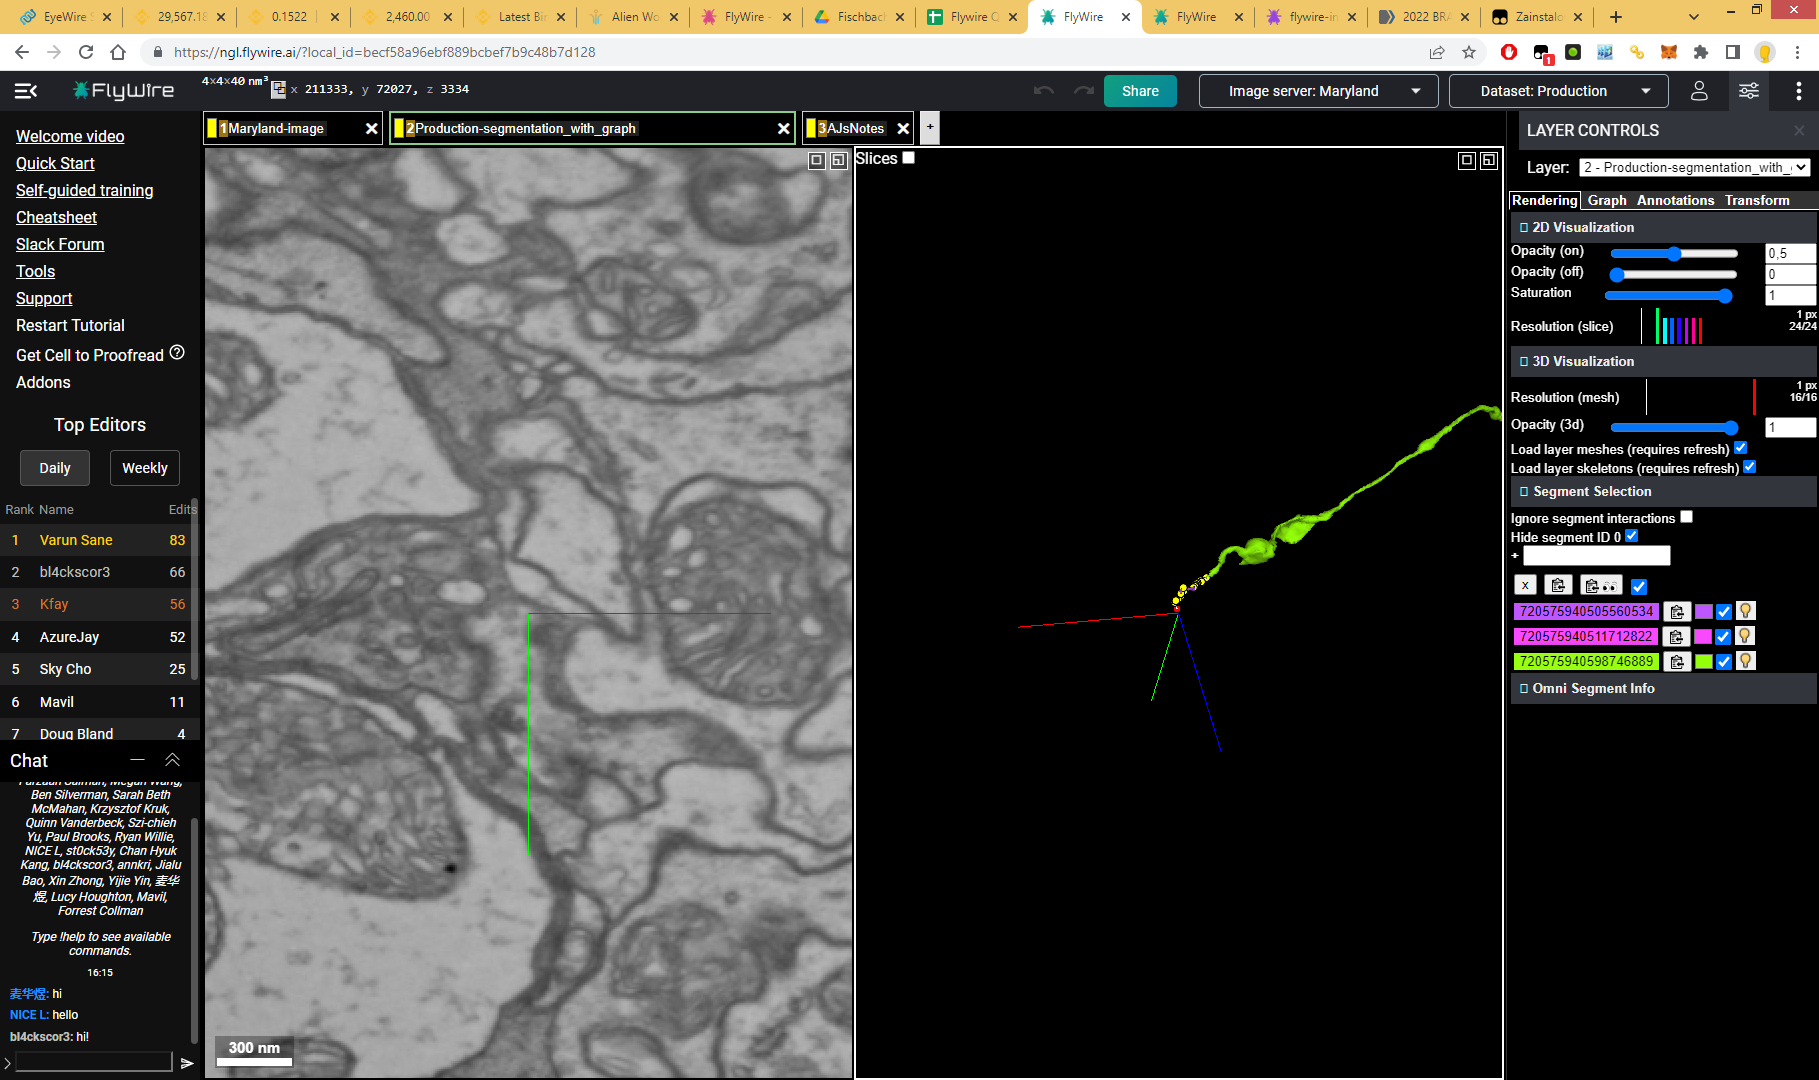
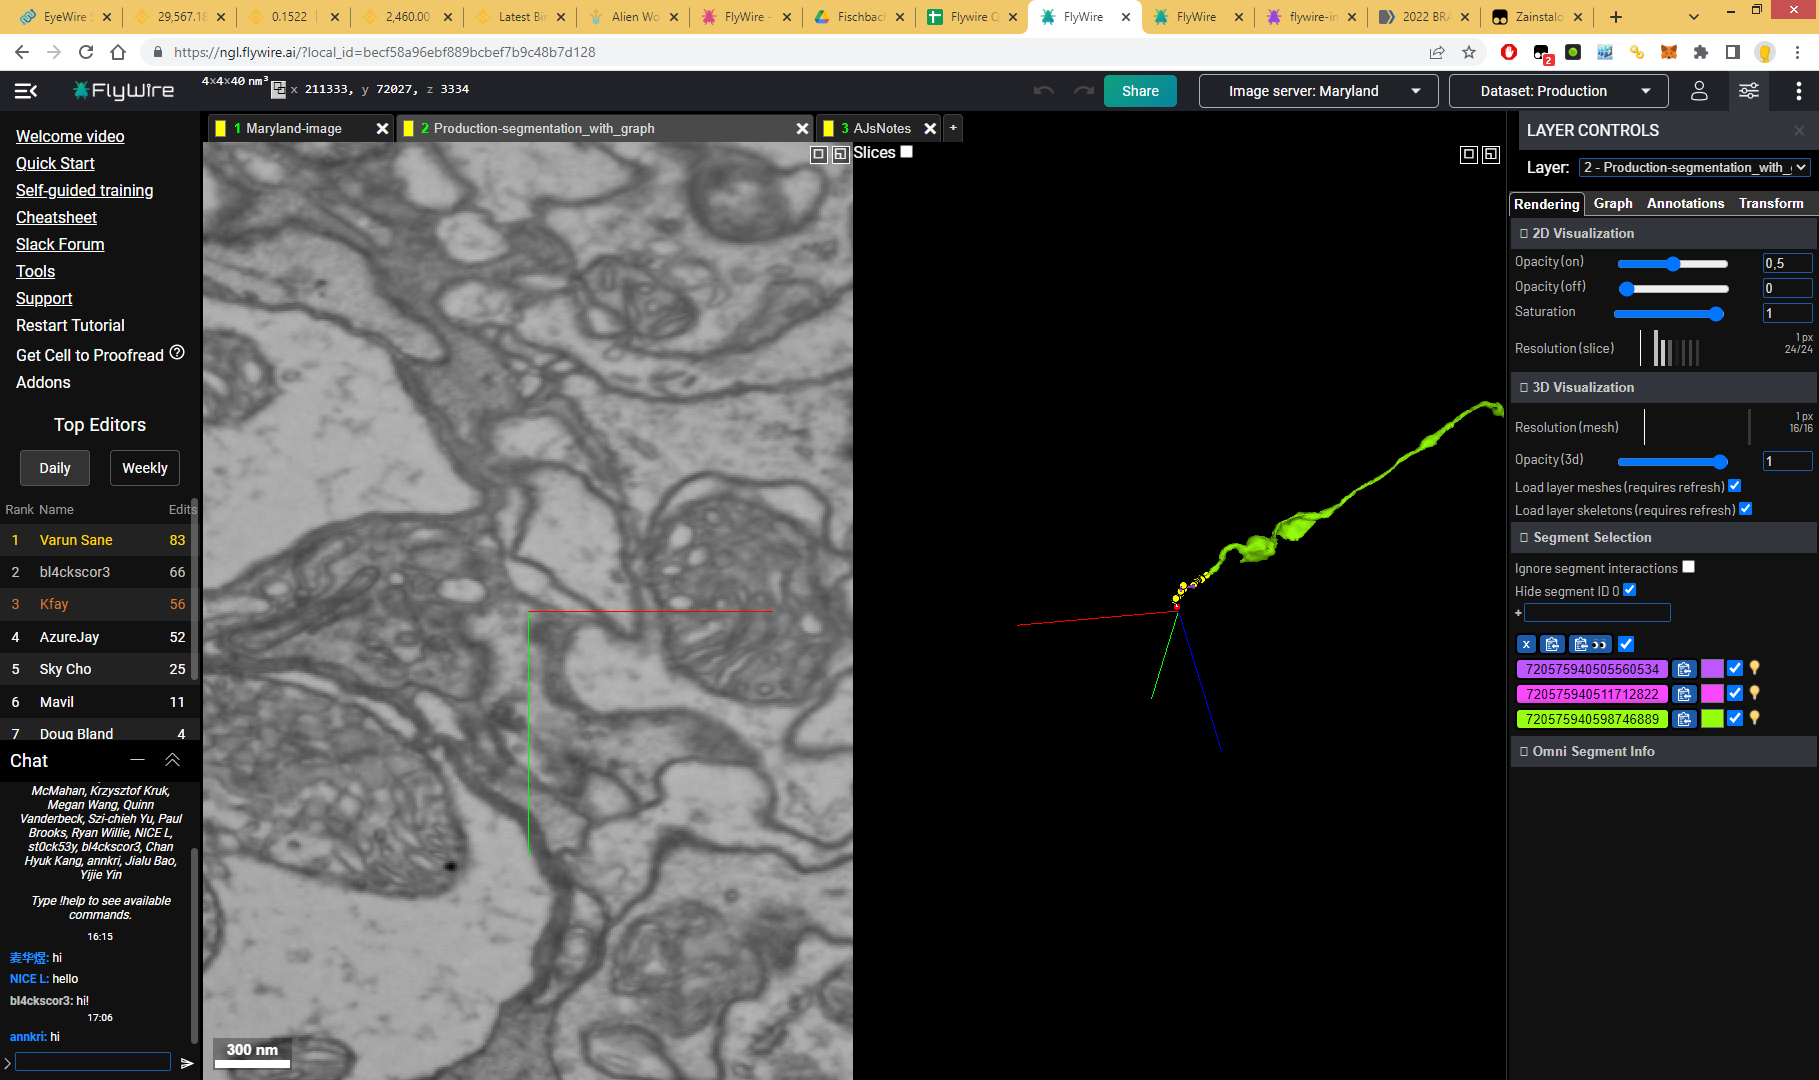
Additional details and update log can be found on the discussion board.
Utilities
Features
- General
- Jump to any segment
- Add annotation point to the “start point” location when claiming a cell
- Switch between 1px (high quality) and 5px (fast loading) resolutions
- Option to remove all old annotations, multicut points, and paths when selecting a new cell
- Option to add a white background to 3D
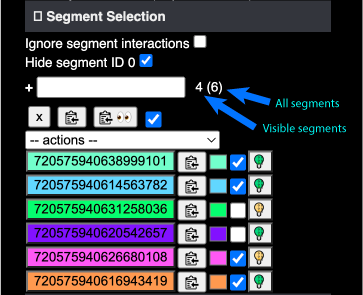
- Segment IDs
- Jump to a segment from its ID
- Hide all segments except 1
- Copy segments to a new tab
- Rename segments
- Multicut
- Remove a multicut point
- Highlight bad supervoxels after failed splits
How to Use
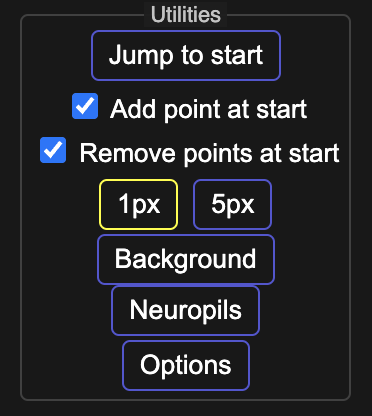
Dock
- Jump to start – Move to the point you were transported to when you claimed a new cell
- ✅ Add point at start – when checked, adds an annotation point at the starting location
- ✅ Remove points at start – when checked, removes all old annotations, multicut points, and paths when selecting a new cell
- 1px / 5px – Select a 2D resolution option. 1px for detailed resolution, 5px for less detailed but faster loading
- Fine adjustments can still be made in the Rendering toolbox
- Background – adds a white background to 3D
- Neuropils – Adds full optic lobe mesh or individual neuropil meshes to 3D
- Options – Add or remove buttons from the Utilities dock
- Removing buttons from the dock will not remove their functionality
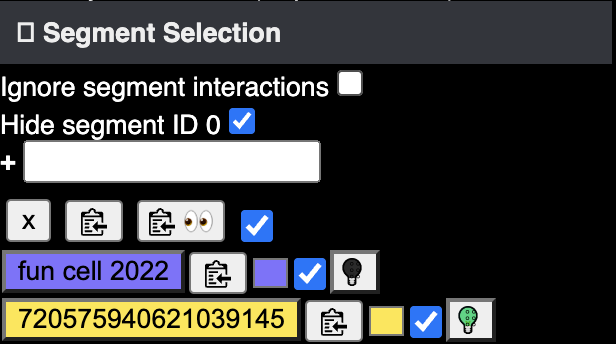
Segments IDs
- Show only this segment
- Right-click on a segment ID’s check box ✅
- Copy one segment to a new tab
- Right-click on a segment ID’s copy button 📋
- Copy all segments to a new tab
- CTRL + Right-click on a segment ID’s copy button 📋
- Jump to a segment’s location
- Right-click on its segment ID 🔢
- if a segment is claimed – jump to the start point
- if a segment is manually added – jump to the point where it was added
- if a segment was split:
- if the split part contains the old jump point – jump to that point
- if the split part doesn’t contain the old jump point – jump to one of the split points
- if a segment was merged:
- if any of the merged parts had a jump point – jump to that point
- if none had a jump point – jump to the place of the merge
- any other case – jump to random point
- Right-click on its segment ID 🔢
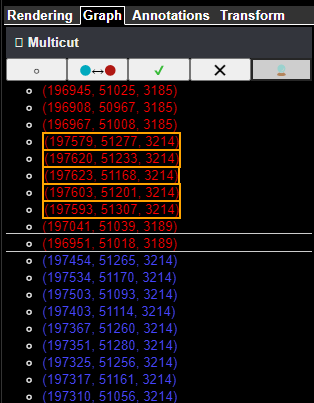
Multicut
- Deselect a multicut point
- Ctrl + Right Click on the point 🔵
- Yellow highlights around point coordinates indicate bad multicut points after an attempted split
Additional details and update log can be found on the discussion board.
Susi (misalignments)
“Most of us still remember how good and helpful Susi was at dealing with all kinds of misalignments. This new addon’s purpose is to help resolving misalignments too, so when I was thinking about its name, Susi came up first in my mind.” – Krzysztof Kruk
Features
- Adds a screenshot of any 2D slice, for easy side by side comparisons when working with misalignments
How to Use
- Click the “Capture” button when you’re on a slide before misalignment
- Scroll past the misalignment
- Compare the images as needed
*Note both the right and left sidebars must be open for proper image alignment
Additional details and update log can be found on the discussion board.
Links (Cell history log)
Features
- Tracks your “Get cell” history
- Allows you to add in your own links with notes
How to Use
- Once installed, a “Links” menu item appears in the left-hand menu (under get cell to proofread)
- Click to open
History
- Automatically updates whenever you click the “Get cell to proofread” button
- Can be edited within the feature
Favorites
- Manually add links to cells you want to remember
- Useful for:
- Tracking a cell you did not get from the “Get cell to proofread” button
- “Pinning” a cell you want to return to, without having to scroll through your cell history
Additional details and update log can be found on the discussion board.
Fragments
Features
- Restore deleted segments
How to Use
- When activated, the feature appears in the dock
- After deleting a segment, a yellow square appears in the Fragments toolbar
- Click the square to restore your deleted segment
Tips
- Your most recently deleted segment appears in the right-most box
- Older segments will push left as newer deleted segments are added to the queue
- If a segment has been deleted multiple times, it will be removed from the list and re-queued at the front of the list
- Segments are not removed from the list upon refresh or choosing a new cell to proofread
Additional details and update log can be found on the discussion board.
Names
Features
- Re-name a segment
How to Use
- CTRL + Right-click on a segment ID 🔢
- Enter the new name + save
Classifier
Features
- Classify a cell type by broad category
- Copy cell IDs for all categorized cells
*Saves locally
What this addon doesn’t do
- Send the classification to the server
- Display status of each cell
- Check if a cell has already been classified
- Warn you when removing cell IDs
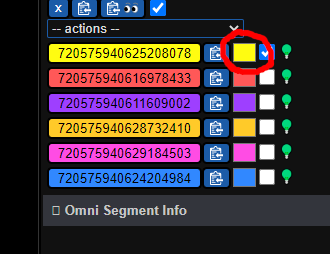
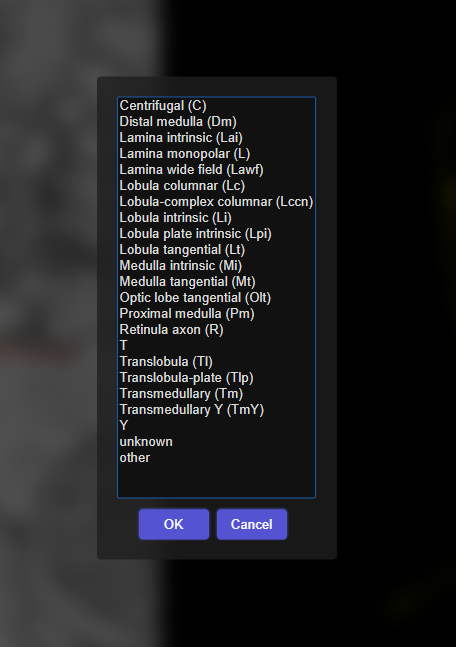
How to Use
- right-click on the “change color” patch
- Select your cell’s category and then press the “OK” button
- Your cell is now locally associated with that category
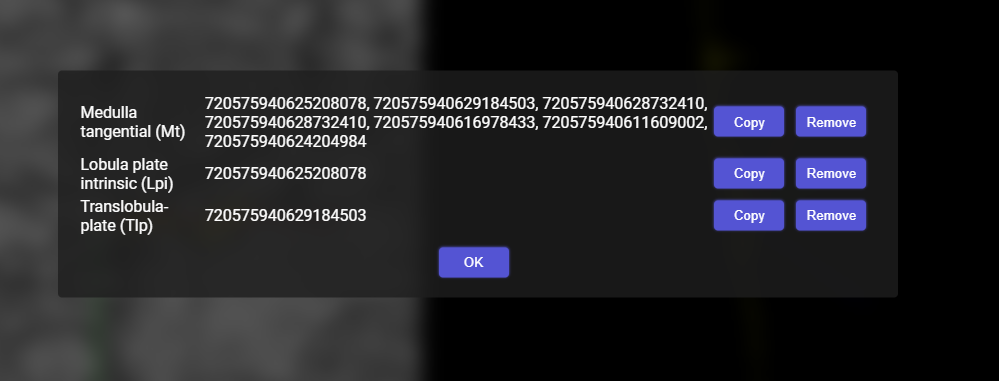
- To see all the classified cells, click on the “Get classified cells” button on the top bar
- Click the “Copy” button to copy all category IDs to your clipboard
- If you wish, you can select cell IDs individually by simply double clicking and copying the desired segment and then pasting it into the segment selection box

Cell Identification Helper
Features
- Easily submit cell labels with uniform syntax
- Quickly select labels instead of typing them out
- Efficiently batch label cells
How to Use
Submit cell identification
- Click on the lightbulb 💡 of the cell you want to identify. Lightbulbs are now purple if they have not yet been labeled, and green if they have already had a label submitted
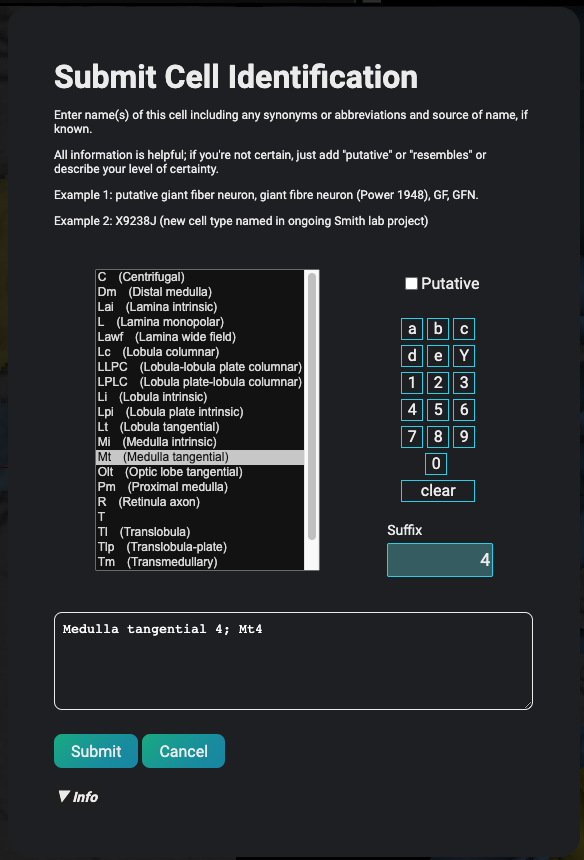
- Click the purple “IDENTIFY” button under the CELL IDENTIFICATION section
- Click on the option that best fits your cell from the list. You can add a suffix such as “4” or “7b” to your cell to ID its specific type. The suffix will automatically be added to both the longform and shortened labels
- If none of the labels are a good fit, you may type in your own or alter the ones provided
- Click “Submit” when you’re ready to label your cell
Batch label cells
This addon provides a secondary feature which may be helpful with batch labeling. It appears in your addons dock as “Identifier” with a “Get cells” button.
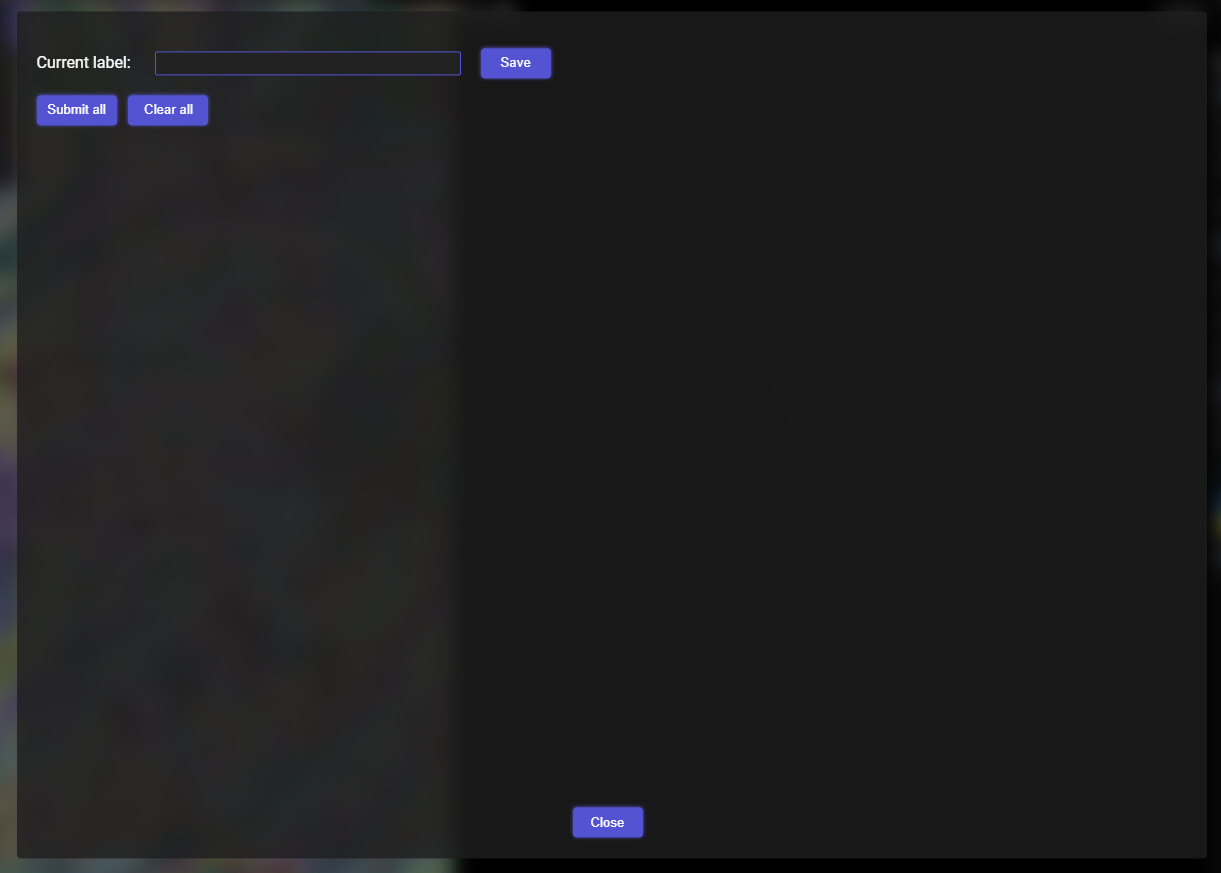
- Click the “Get cells” button to open the labeler.
- In the box that says “Current label” write in the label for the cell type you are currently attempting to label (since there is no dropdown menu here, you may consider copypasting from the “Submit Cell Identification” tool for a standardized label)
- Click “Save” (your label will be saved although nothing new is happening)
- Close the box
- Position your axes into the cell you are attempting to label
- press the (/) or (-) key on your keyboard
- A small green square in the upper right hand corner of your screen is an indication that your label has been successfully submitted
- Repeat steps 5-6 for as many cells as needed
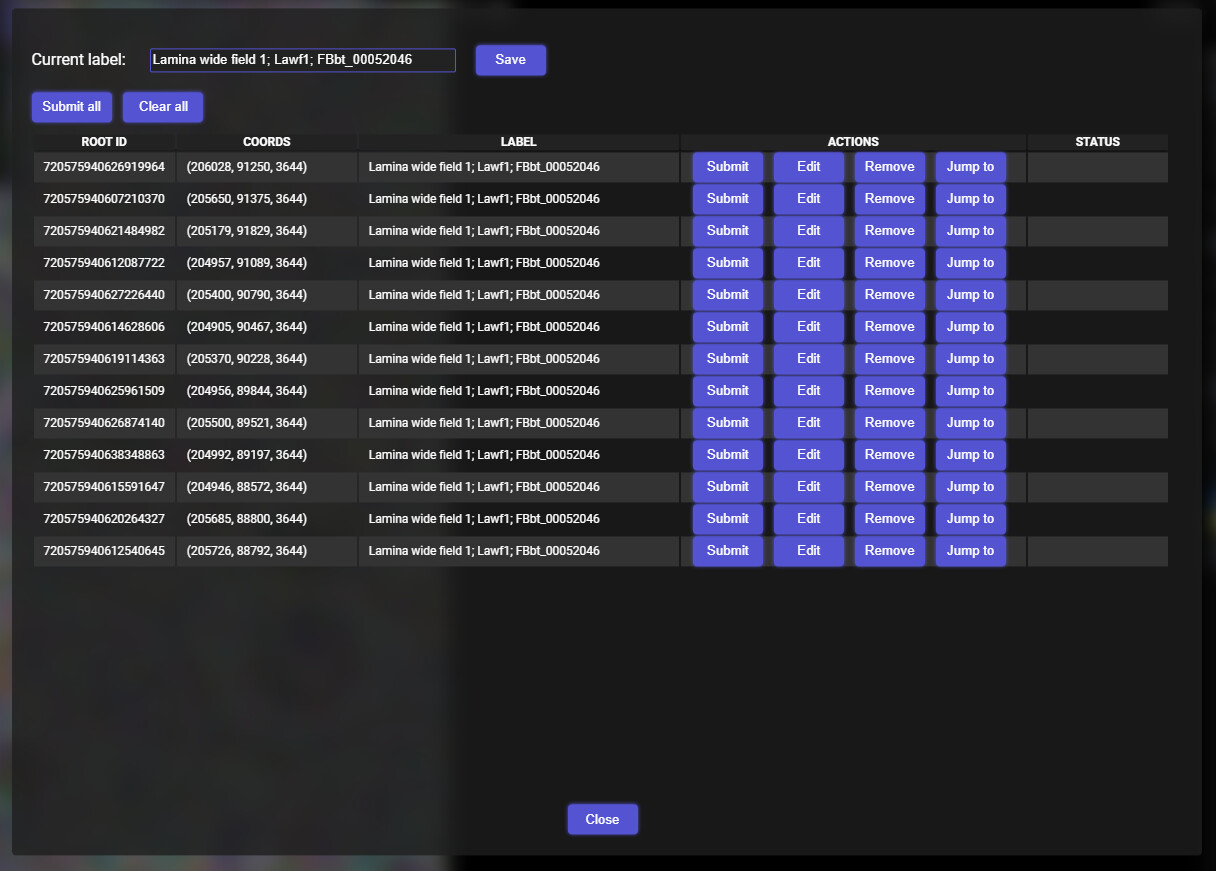
- Click the “Get cells” button again to see which cells you have saved
- If you want to add a new cell type to the list type it into the “Current label” box and repeat steps 2-4
- You can take various actions while in the “Identifier” tool including
- Submitting current labels for your cells
- Jumping to any individual cell
- Submitting a label for any individual cell
- Editing a label
- Deleting a label from the list

Additional details and update log can be found on the discussion board.
Batch Processor
Features
- Apply actions to groups of cells including:
- Recoloring all visible cells
- Showing/hiding cells of a certain type
- Opening cell groups in a new tab
- Removing cell groups
- Copying cell groups
- Find common synaptic partners for up to 10 visible cells
How to use:
- Click the “actions” dropdown menu in the middle section of the screen
- Select your desired action
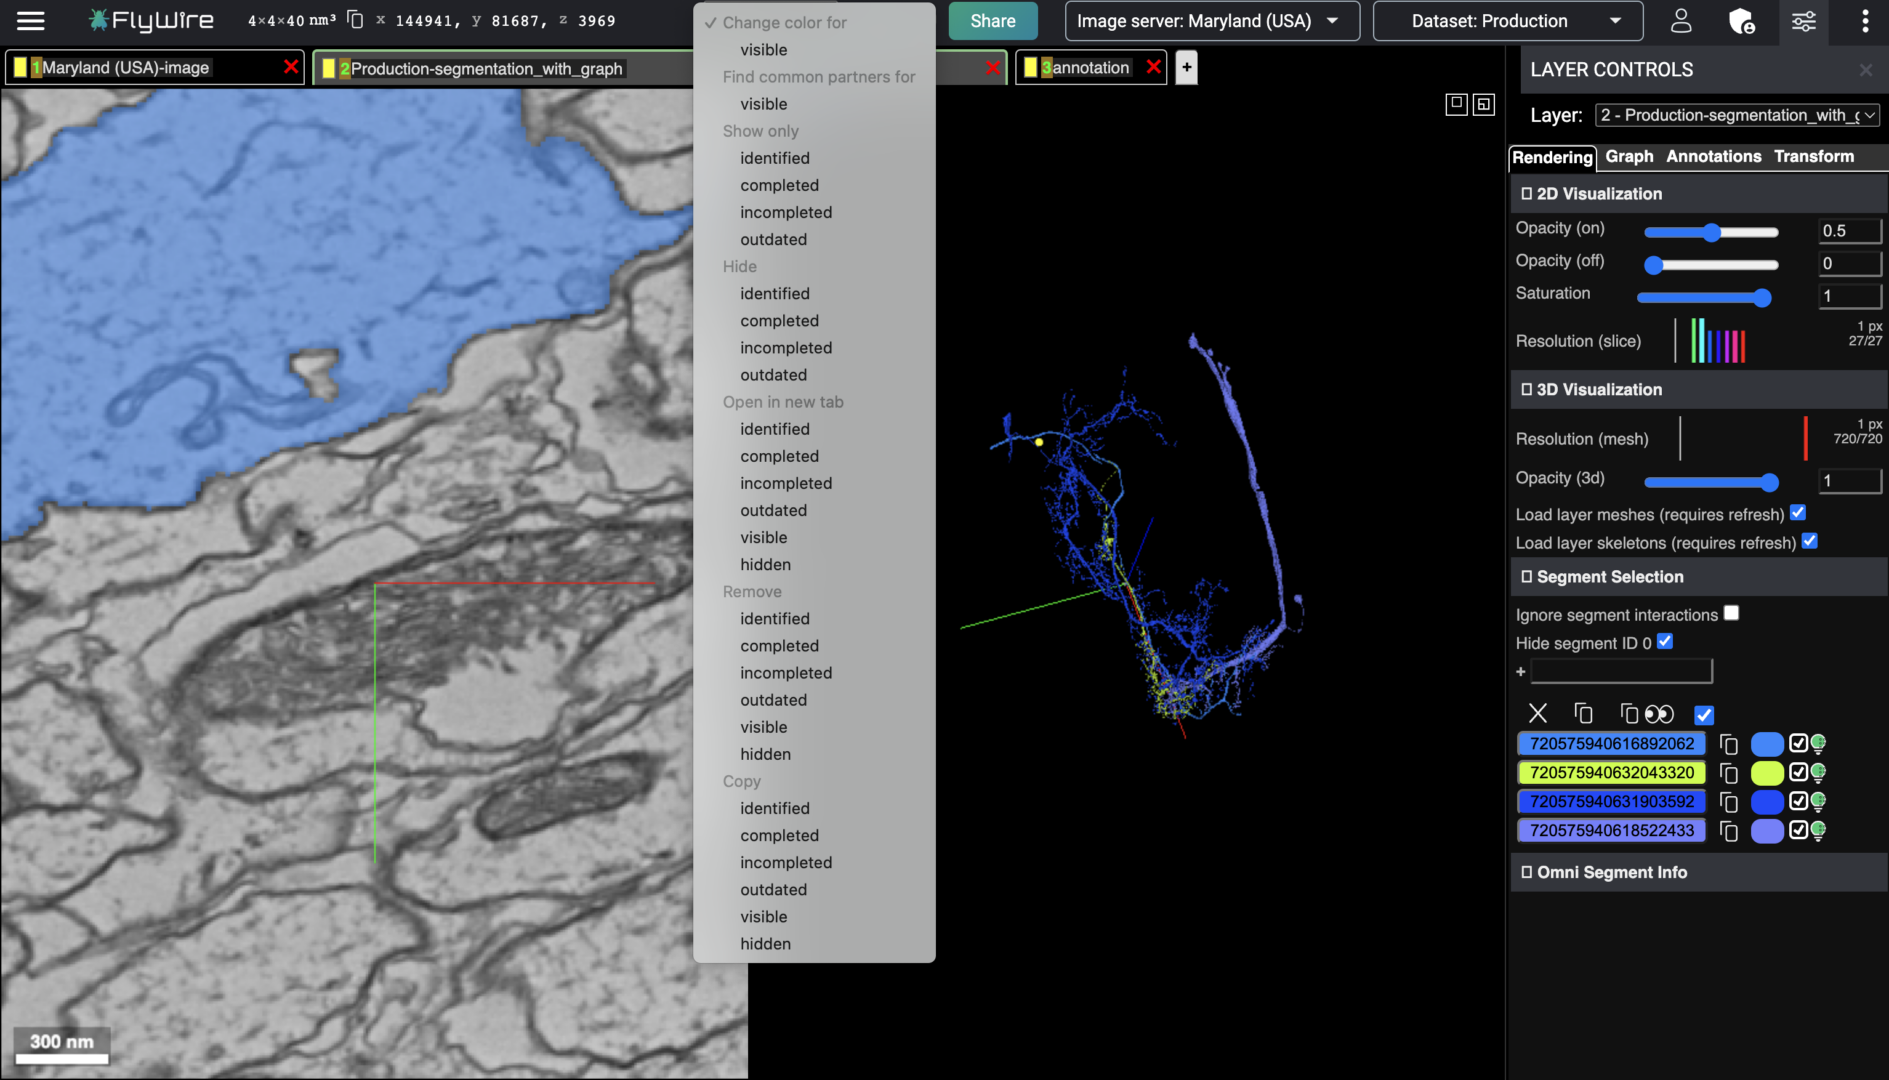
Additional instructions for finding synaptic partners:
- Select “Find common partners for visible” from the “actions” menu
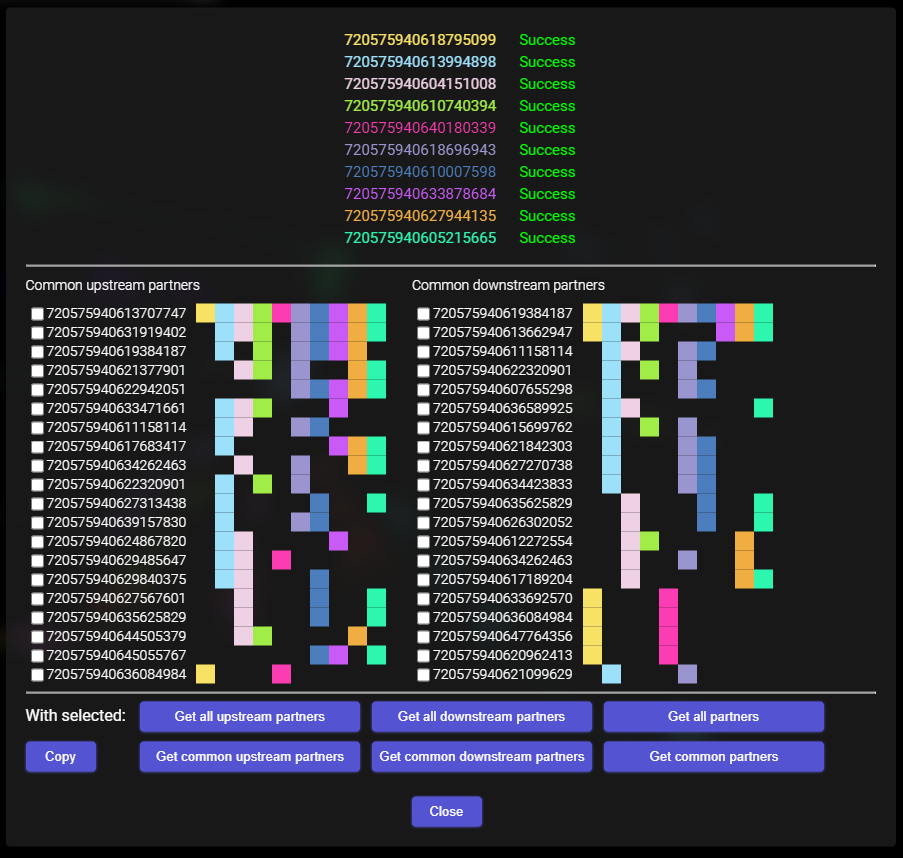
- A popup window will open with a list of segments, wait for it to run
- Pulls data from the Connectivity app’s API
- Once completed you will see a list with all segments containing upstream and downstream partners for your cells
- Colorful squares next to a segment ID show the number of synaptic partners with the original cell inputs. Their colors correspond with the colors of the segment IDs in the original list
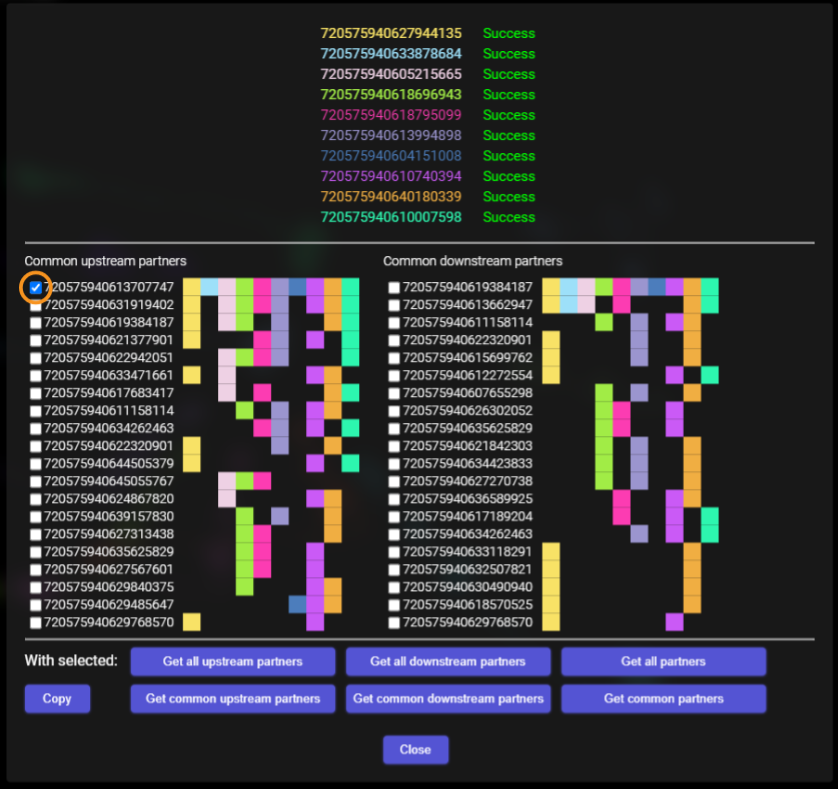
- Select your desired synaptic partners
- Select your desired outcome
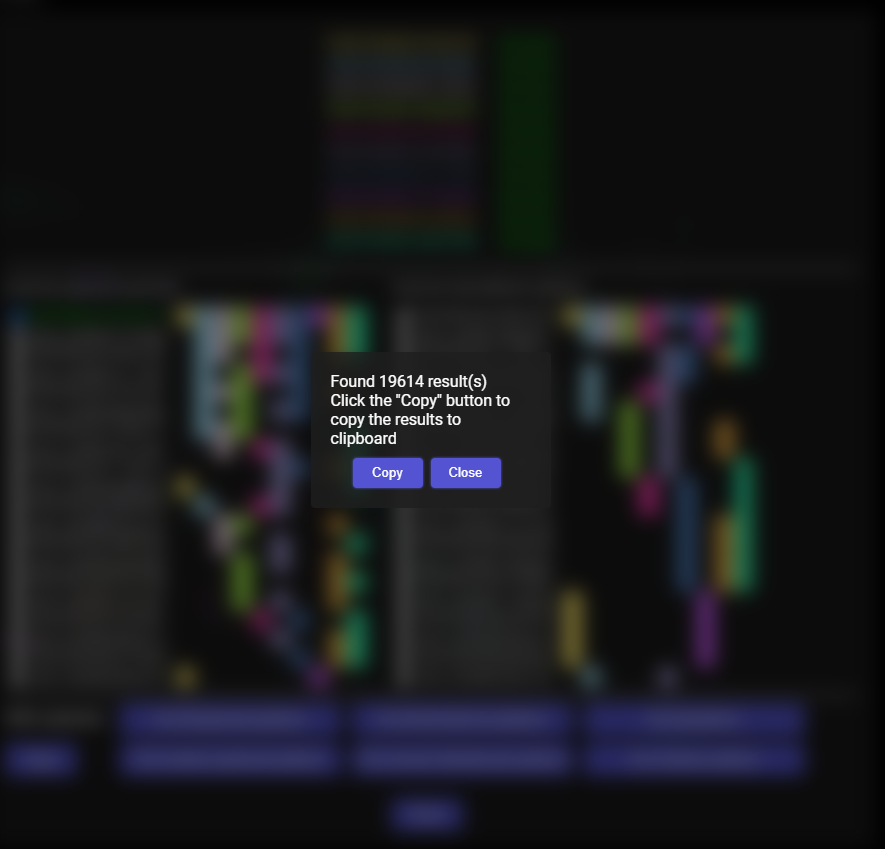
- “Copy” – copy all selected synaptic partners
- “Get all [upstream/downstream] partners” – Get all synaptic partners for all selected segment IDs (2 levels removed from the original cells)
- “Get common [upstream/downstream] partners” – Get only shared synaptic partners for all selected cell IDs (2 levels removed from the original cells)
- To make your chosen cell IDs visible you must copy and paste them into the segment selector

Additional details and update log can be found on the discussion board.
8 responses to “FlyWire Addons”
[…] well as FlyWire’s browser add-ons, there are a few different things you can do on FlyWire to alter your user experience, without any […]
[…] Download instructions and additional details here*. […]
[…] you have not used addons before, please see this blog post for instructions on how to install […]
[…] this post for a comprehensive list of addons and more detailed instructions on using the addons listed in […]
[…] nothing had a greater impact on citizen science in FlyWire than Krzystof’s plugins. Check out this post for a summary of the latest functionality. KK created a host of useful features in FlyWire, improving everything from cell […]
These plugins are really cool and enhance the interactivity of the proofreading process. So, may I ask whether these plugins are used directly on Neuroglancer, rather than on Flywire (even though Flywire’s visualization interface is based on Neuroglancer)?
Hi Achilles, Thanks for your inquiry! Unfortunately, these plugins are currently only compatible with the FlyWire version of neuroglancer. In the future, we hope to get some of these useful features incorporated into the base neuroglancer software outside of the FlyWire platform.
Bravo, magnificent idea