As well as FlyWire’s browser add-ons, there are a few different things you can do on FlyWire to alter your user experience, without any add-ons needed. You don’t need to consider these tricks necessary for getting the hang of the Neuroglancer platform, but for those of you who like to fiddle with code or explore little Easter eggs, the following is a miscellaneous list of “extras” that you might like to try.
How to take a high resolution screenshot
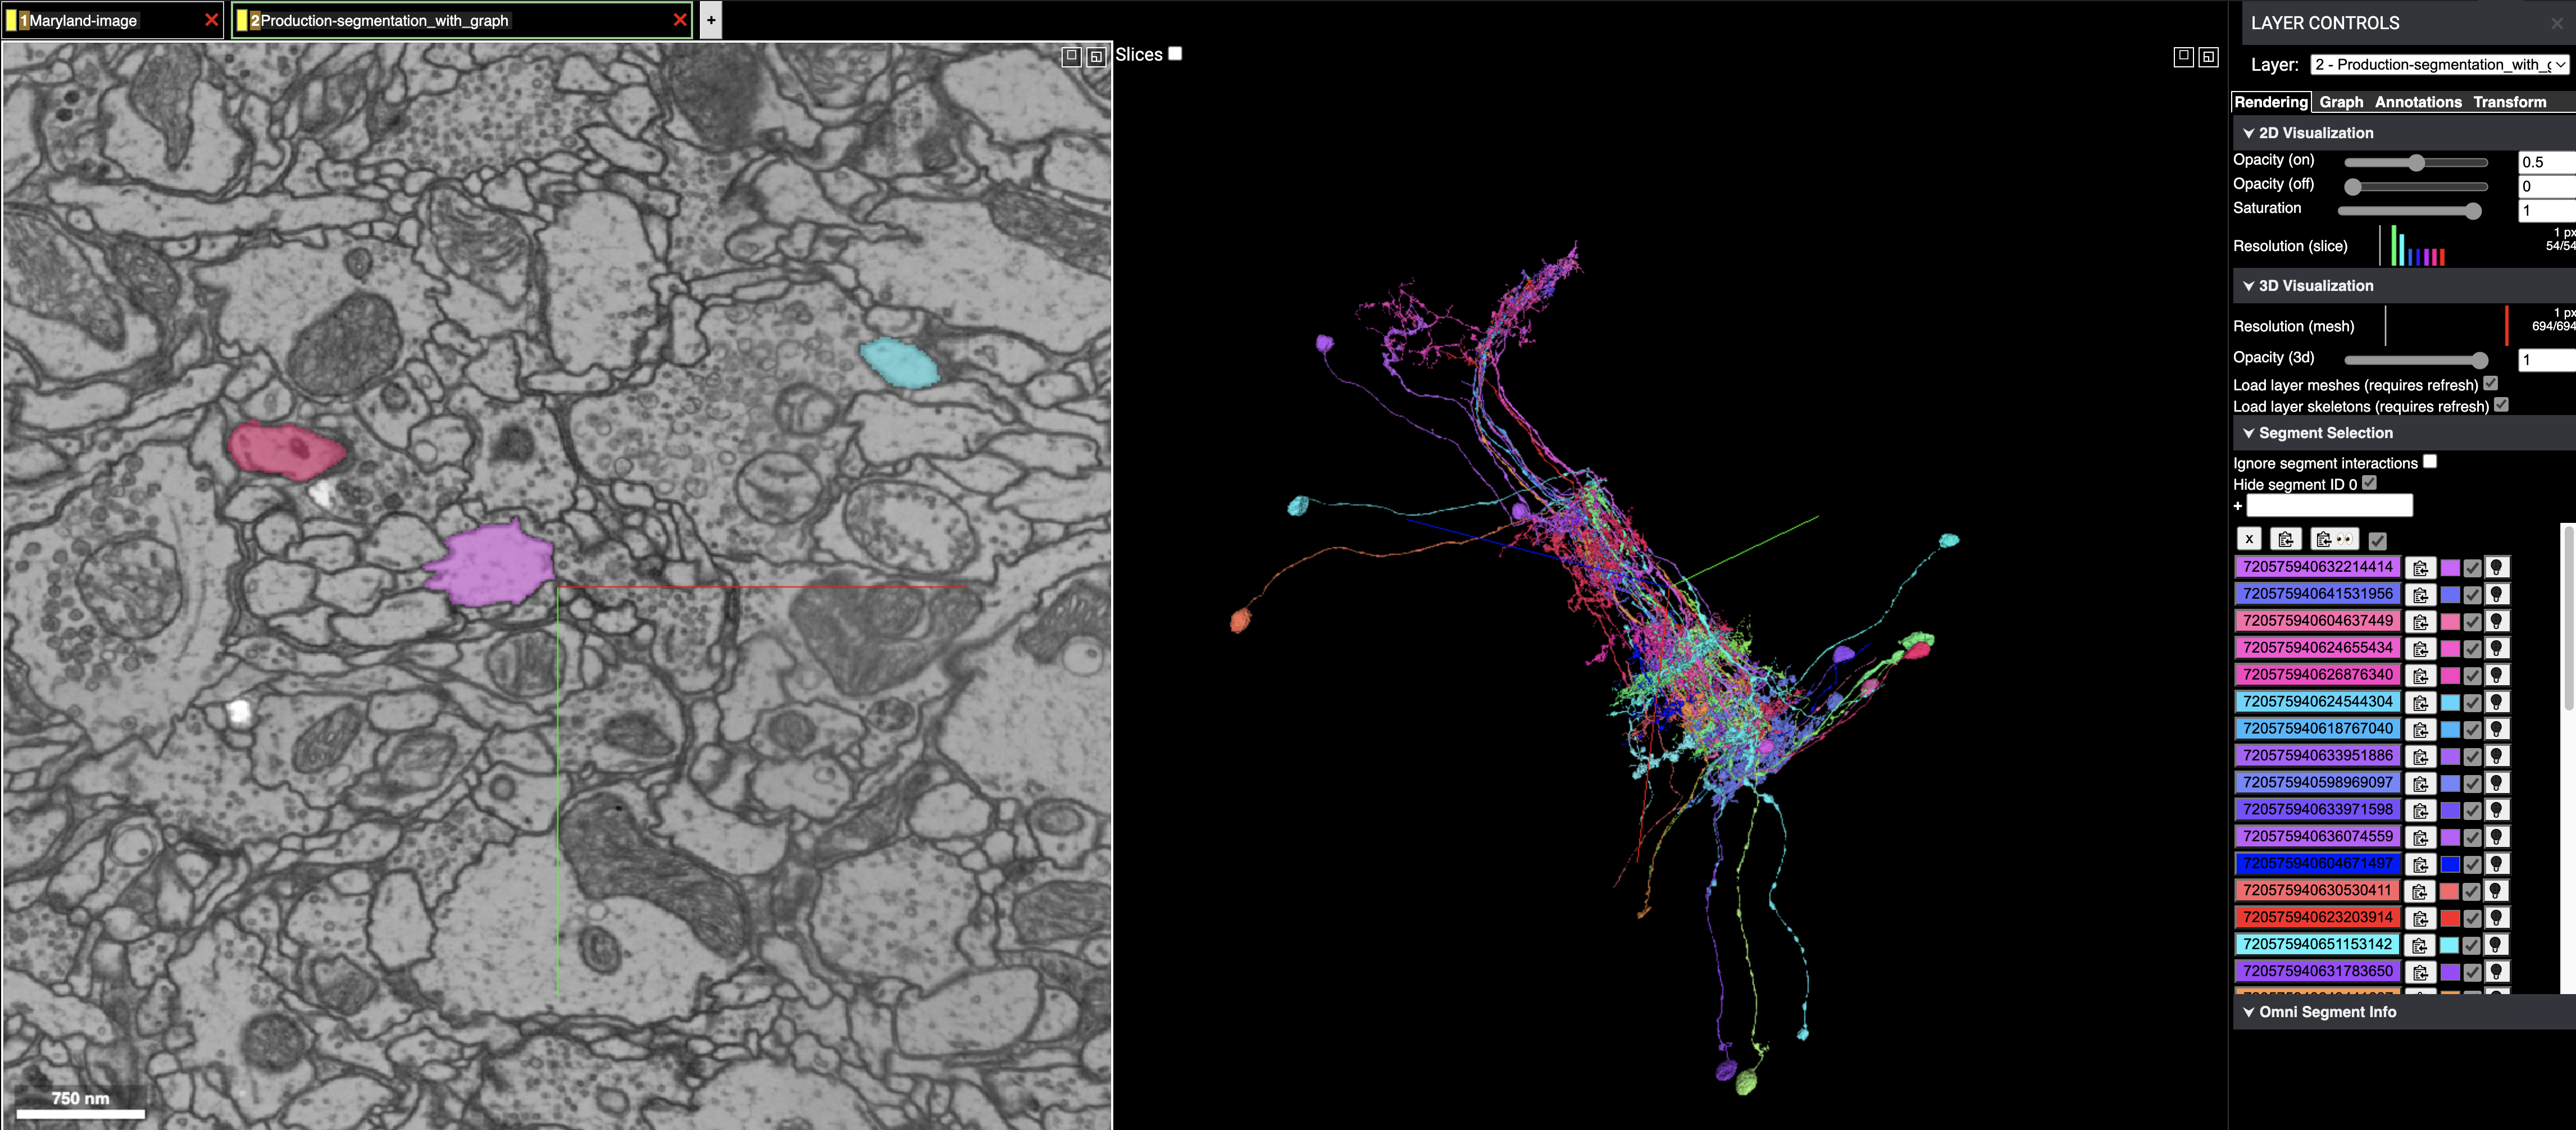
Would you like to capture a high quality image of your cell? You can type Ctrl (Cmd on Mac) and then the – key (the minus sign) to zoom out in Chrome. Copy your screen, and then as long as your device is reasonably modern, this should give you a high res screenshot.
If this method doesn’t give you quite what you need, check out this discussion board post for a more complex but effective alternative.
How to get a white background
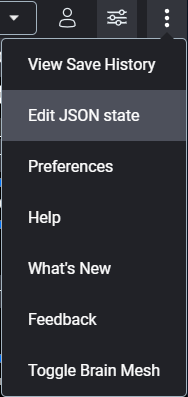
For circumstances where you may need a white background behind your cells, select the three dots on the top right of your FlyWire tab, and click “Edit JSON State.”
This will open a text field you can edit. Before the last line about “layout,” add these lines:
“crossSectionBackgroundColor”: “#ffffff”,
“perspectiveViewBackgroundColor”: “#ffffff”,
The result should look as follows:
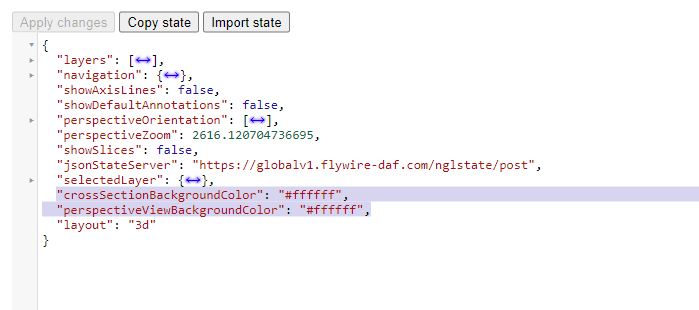
Click “Apply Changes” and you should then see cells with a white background.
How to change image quality for improved loading time
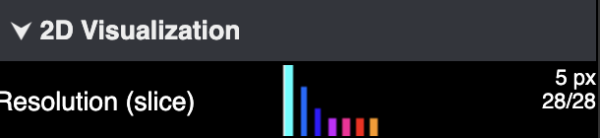
If changing your image server doesn’t help enough and you’re mostly just checking larger branches, you can also manually downgrade your image quality. Open your Layer Controls panel, make sure it’s selected your 2D layer (i.e. “Maryland image” or “Cambridge UK image”), then click the Rendering tab, where you will see this:
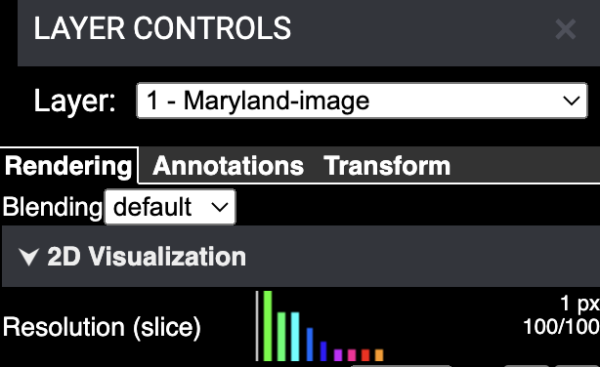
Move the Resolution slider to 5px; this will look grainier but can still be good enough for many purposes.
Clearing unnecessary data for improved speed in general
One reason you may experience overall slow computer speeds when using FlyWire is that currently the Neuroglancer platform recreates lightbulb menus for all added segments every 2 minutes, but it doesn’t purge old menus from your browser’s cached data. If you work with lots of segments and don’t refresh for a while, this will naturally build up data in the background and slow things down. A workaround at the moment is to open your browser console (hit F12), then paste this code:
setInterval(() => { menus = document.getElementsByClassName(‘neuroglancer-layer-group-viewer-context-menu’) segments = viewer.saver.pull().state.layers[1].segments.length + viewer.saver.pull().state.layers[1].hiddenSegments.length if (menus.length > segments) for (let i = menus.length – 1; i > segments + 10; i–) menus[i].remove() }, 60000)
This will clear out old menus for segments every 60 seconds. You need to re-enter this after refreshing, but @KrzysztofKruk has also made a script you can run through TamperMonkey to automate the process if you prefer. Hopefully in the future we’ll have an even more permanent solution to this behavior!
Changing contrast & brightness of 2D slices
Have you ever felt like you’d be able to interpret a slice better if you could see it in slightly different greyscale? You can adjust your 2D’s contrast and brightness by opening your Layer Controls panel and selecting your 2D layer (i.e. “Maryland image” or “Cambridge UK image”), then opening the 2D Visualization section. You should see a white text box where you can enter code.
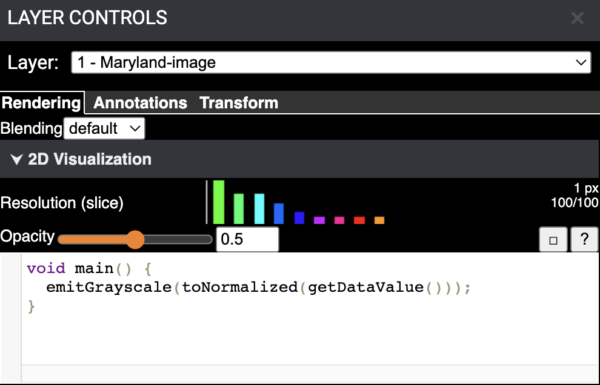
As you can see, the code that’s already here reads:
void main() { emitGrayscale(toNormalized(getDataValue())); }
But you can alter it. Before the final ); you can add numerical values that will adjust either contrast or brightness.
Contrast
Add an asterisk (*) and a decimal value either greater than or less than 1.0. A higher value will increase your contrast, while a lower value will decrease it. Example of a higher contrast:
void main() { emitGrayscale(toNormalized(getDataValue()) * 1.3); }
Example of lower contrast:
void main() { emitGrayscale(toNormalized(getDataValue()) * 0.8); }
BRIghtness
Instead of an asterisk, add a plus or minus sign (+/-) and a decimal value greater than or less than 0.0. (Yes, 0.0, unfortunately this is demarcated a different way than contrast!) A positive value will increase your brightness, while a negative value will decrease it. Example of increased brightness:
void main() { emitGrayscale(toNormalized(getDataValue()) + 0.6); }
Example of decreased brightness:
void main() { emitGrayscale(toNormalized(getDataValue()) – 0.4); }
We hope this information is interesting and useful for anyone inclined to experimentation! And feel free to check this page periodically as we may update it over time.
Big thanks to @KrzysztofKruk for originally sharing many of these tricks on the discussion board!
One response to “Extras to Enhance FlyWire”
How can users enhance their FlyWire experience without browser add-ons, exploring available features to customize and optimize their interaction? Regard Telkom University