Spelunker is the latest neuroglancer platform for proofreading and annotating large electron microscopy datasets. Whether you’re brand new to proofreading or or need some guidance while getting acquainted with the updated platform, this tutorial will help get going.
Request access to BANC at https://flywire.ai/banc
Interface overview
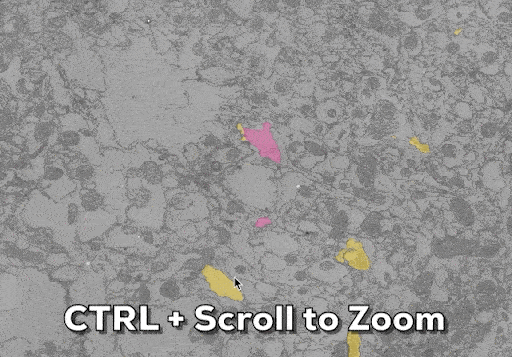
Let’s begin by taking a look at the spelunker interface. Here we’ve highlighted some areas of interest which are frequently used.
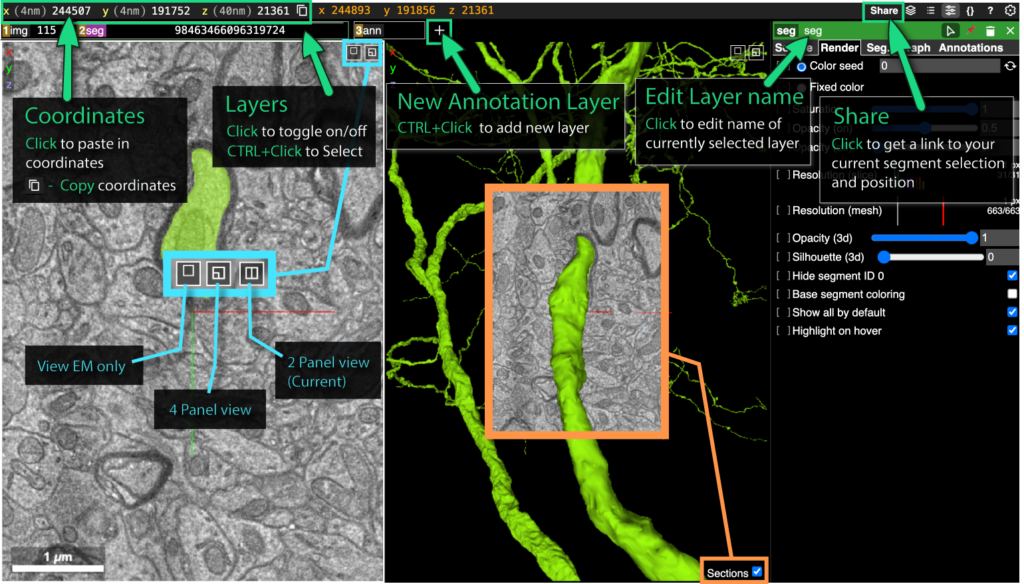
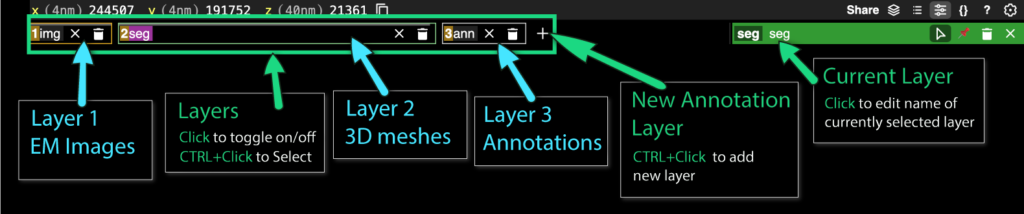
Let’s take a closer look at just the layers, which sit at the top of the screen. Each layer can have its visibility toggled on or off, and each has a different set of tools associated with it.
You will mainly be working in Layer 2, the 3D segmentation layer.
*Note: you can also toggle layers on/off by pressing a number key associated with their layer (example: press “2” on your keyboard to turn off layer 2).
*Note 2: EM images refer to “Electron Microscopy Images” or the 2D black and white cross sections of cells (left panel in the 2 panel view).
Mouse and keyboard navigation in Spelunker
Note: If you are familiar with FlyWire you can skip this section – the controls are essentially the same.
If you have not used FlyWire, you may choose to do the FlyWire tutorial for a more hands-on approach to learning interface navigation. You can access that here (you will need to log in with a google account).
Select a neuron
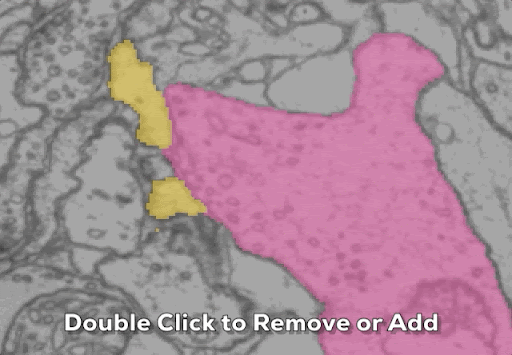
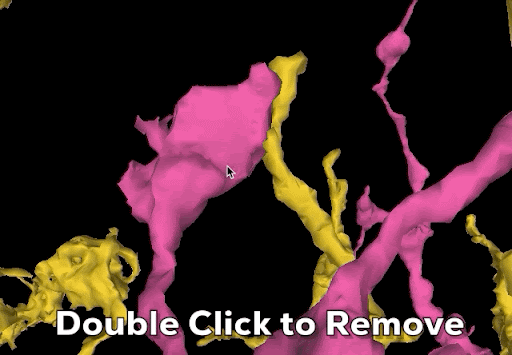
You can’t do any proofreading without a neuron! Double click in the 2D to add a neuron, double click in either 2D or 3D to remove.
Move Through 3D Space
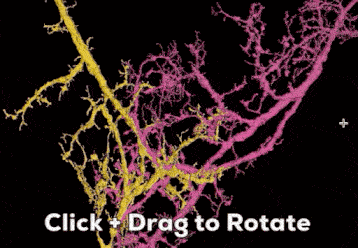
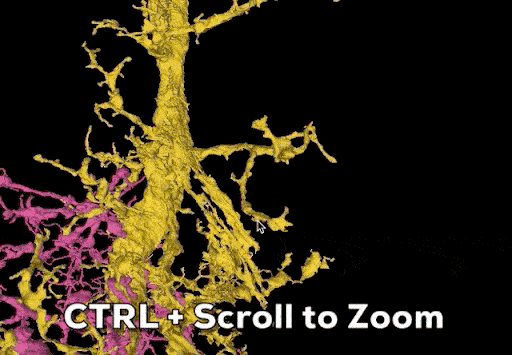
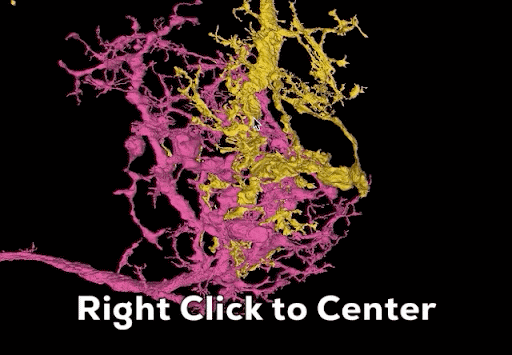
When your mouse is hovered over the 3D area, use these controls to manipulate the 3D model.
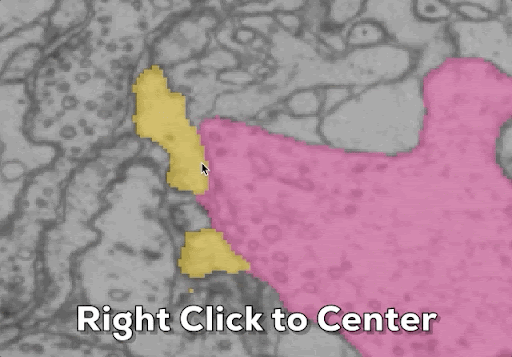
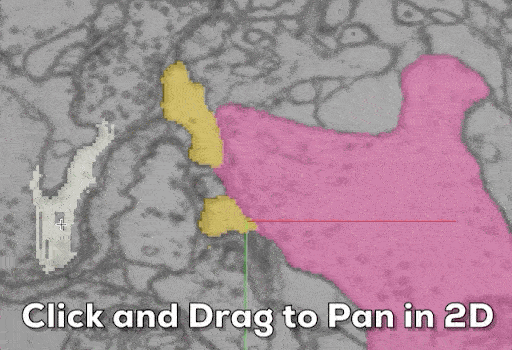
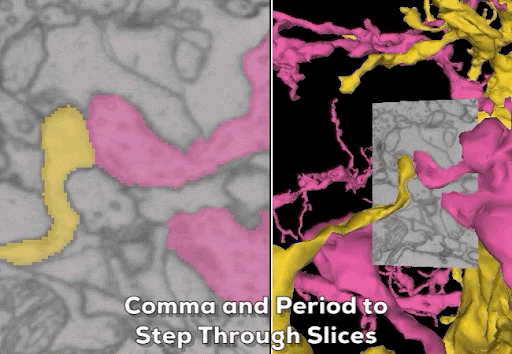
Move Through 2D Space
When working with the 2D EM images, the following controls will help you maneuver across and through slices.
Segmentation Menu
Let’s learn how to work with segment IDs. These IDs will appear when you select one or more segments in the EM.
You can navigate to this menu by selecting “Layer 2 seg” (CTRL+click to select a layer) in the top menu, and then selecting the “Seg.” tab in the right panel menu.
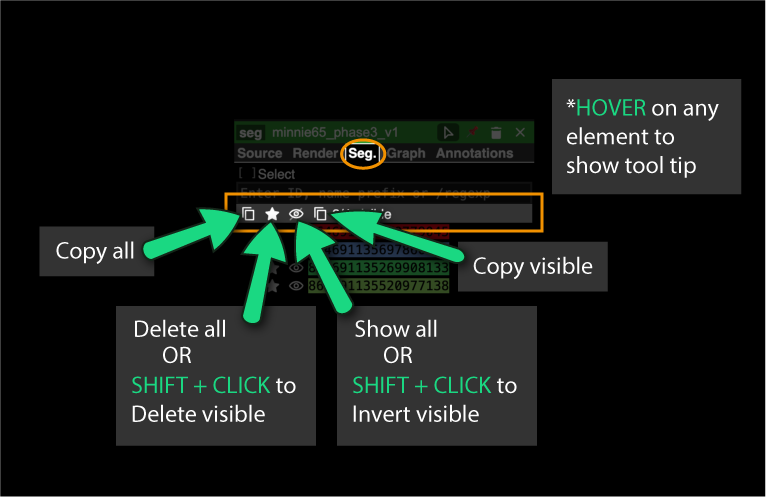
Let’s go over some of the controls you will use in this menu.
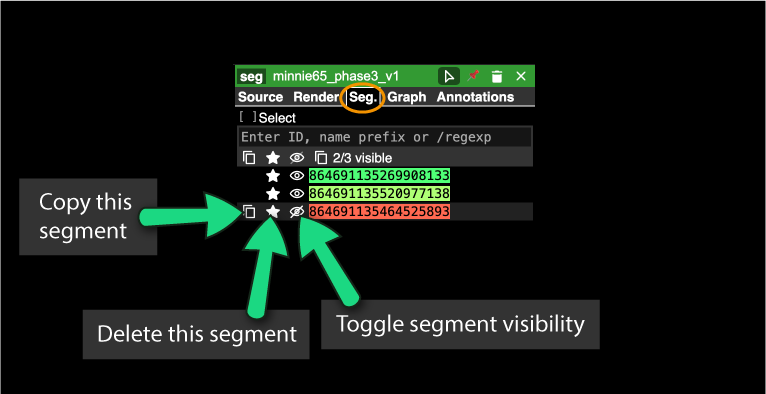
*NEW: When you click to remove a currently visible segment by double clicking it in the EM, the segment ID will NOT be removed from your list. Instead it becomes visually hidden, but its ID remains in your list.
Using coordinates to find cells
Watch the video below to learn more about navigating the segmentation menu when adding segments directly.
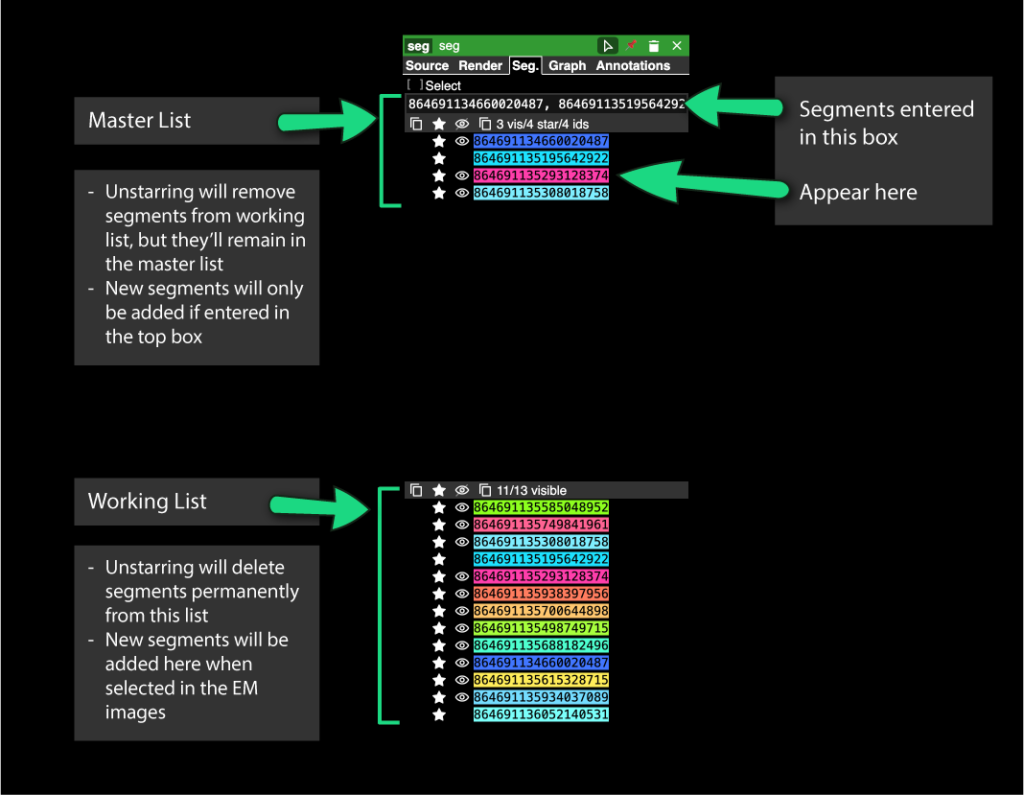
Advanced: using segment IDs to find cells
You can add in more complexity to this process when you use segment IDs to add segments, rather than just by clicking them in the EM images.
Here’s a quick guide to remind you how to navigate the Master and Working Lists when adding segments via their segment IDs.
Proofreading with Keyboard Controls
Now that you are familiar with the interface, it’s time to start fixing cells! In Spelunker, proofreading actions are mainly preformed using key presses.
A menu that appears as a footer at the bottom of your screen will indicate which action is currently active.

To exit from one of these menus press the engagement key (such as C for Split) a 2nd time.
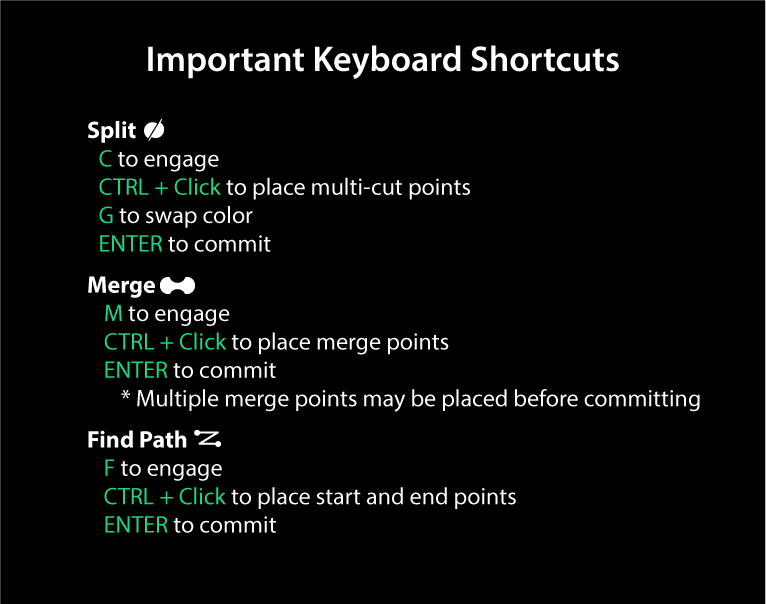
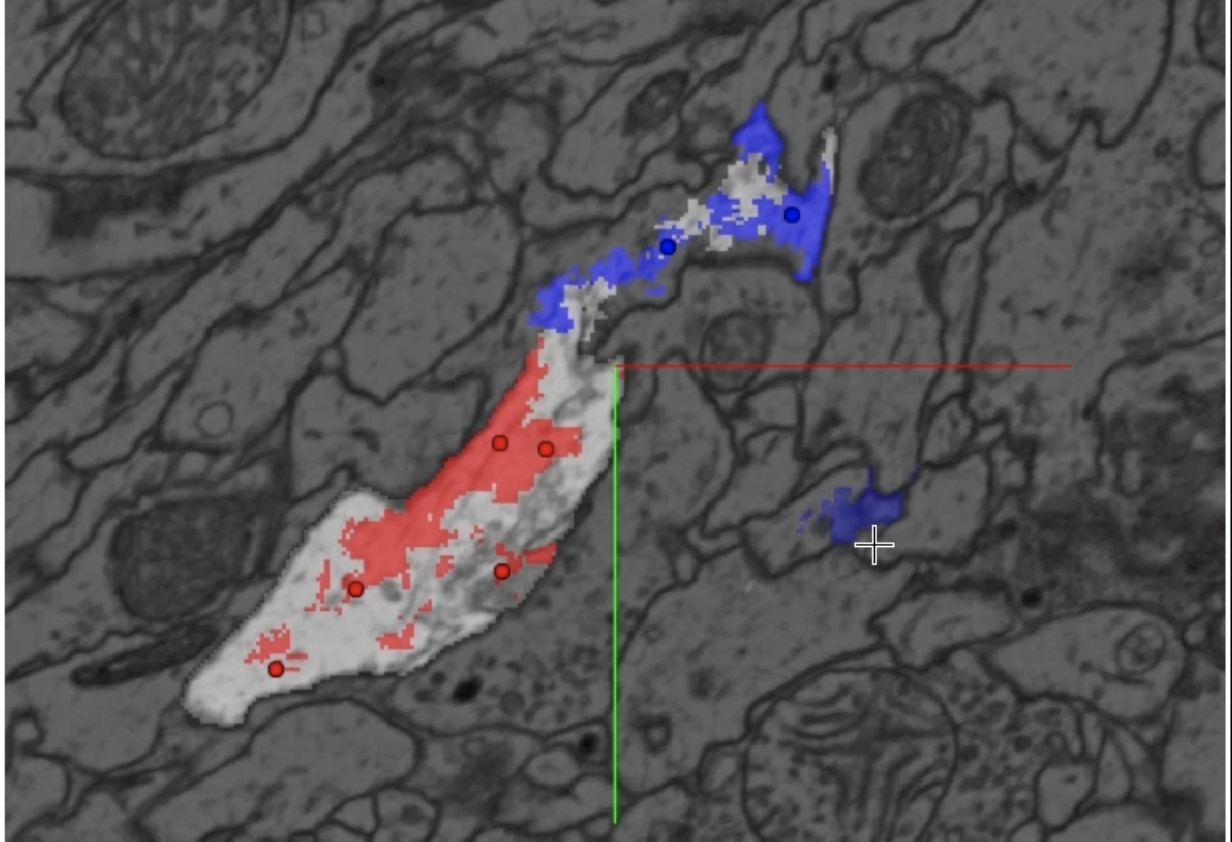
Splitting
Used for cutting away bad branches.
Splitting has been much improved in Spelunker. Actions to complete a split are as follows:
- Press “C” to engage split mode (think C for “cut”)
- Red split points are automatically engaged. CTRL+click to place them
- Press “G” to toggle to blue split points. CTRL+click to place them
- Press “Enter” to execute the split!
Merging
Used to fuse two segments that belong to the same cell.
One big improvement to merging in Spelunker is that multiple branches can be merged at once, as demonstrated in the above video.
Find Path
The “Find Path” function allows you to locate a connective path between any two points placed along your cell. This can be very useful when trying to navigate through a large cell, or to locate an origin point for a merger.

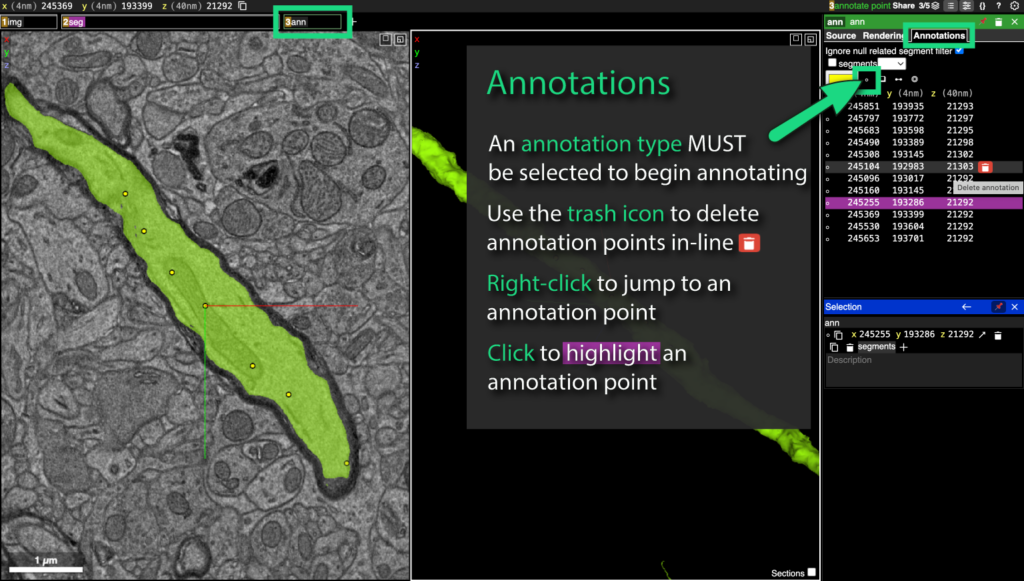
Annotations
Annotations have many use cases and are often used to keep track of your work, or to share information between proofreaders.
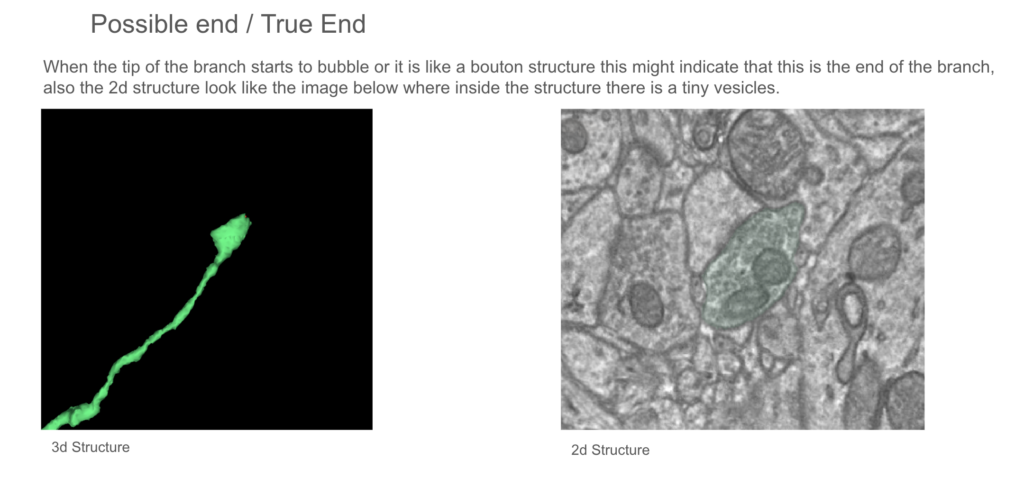
Identifying Completed Ends
Sometimes you may be looking for an extension on a cell where are none to be found. Cell branches eventually terminate, and you don’t want to get stuck looking for a phantom continuation that doesn’t exist.
Natural branch terminations:
- Are usually soft and round in shape, as opposed to sharp or jagged
- A bulbous projection such as a bouton or spine can indicate a branch’s termination point