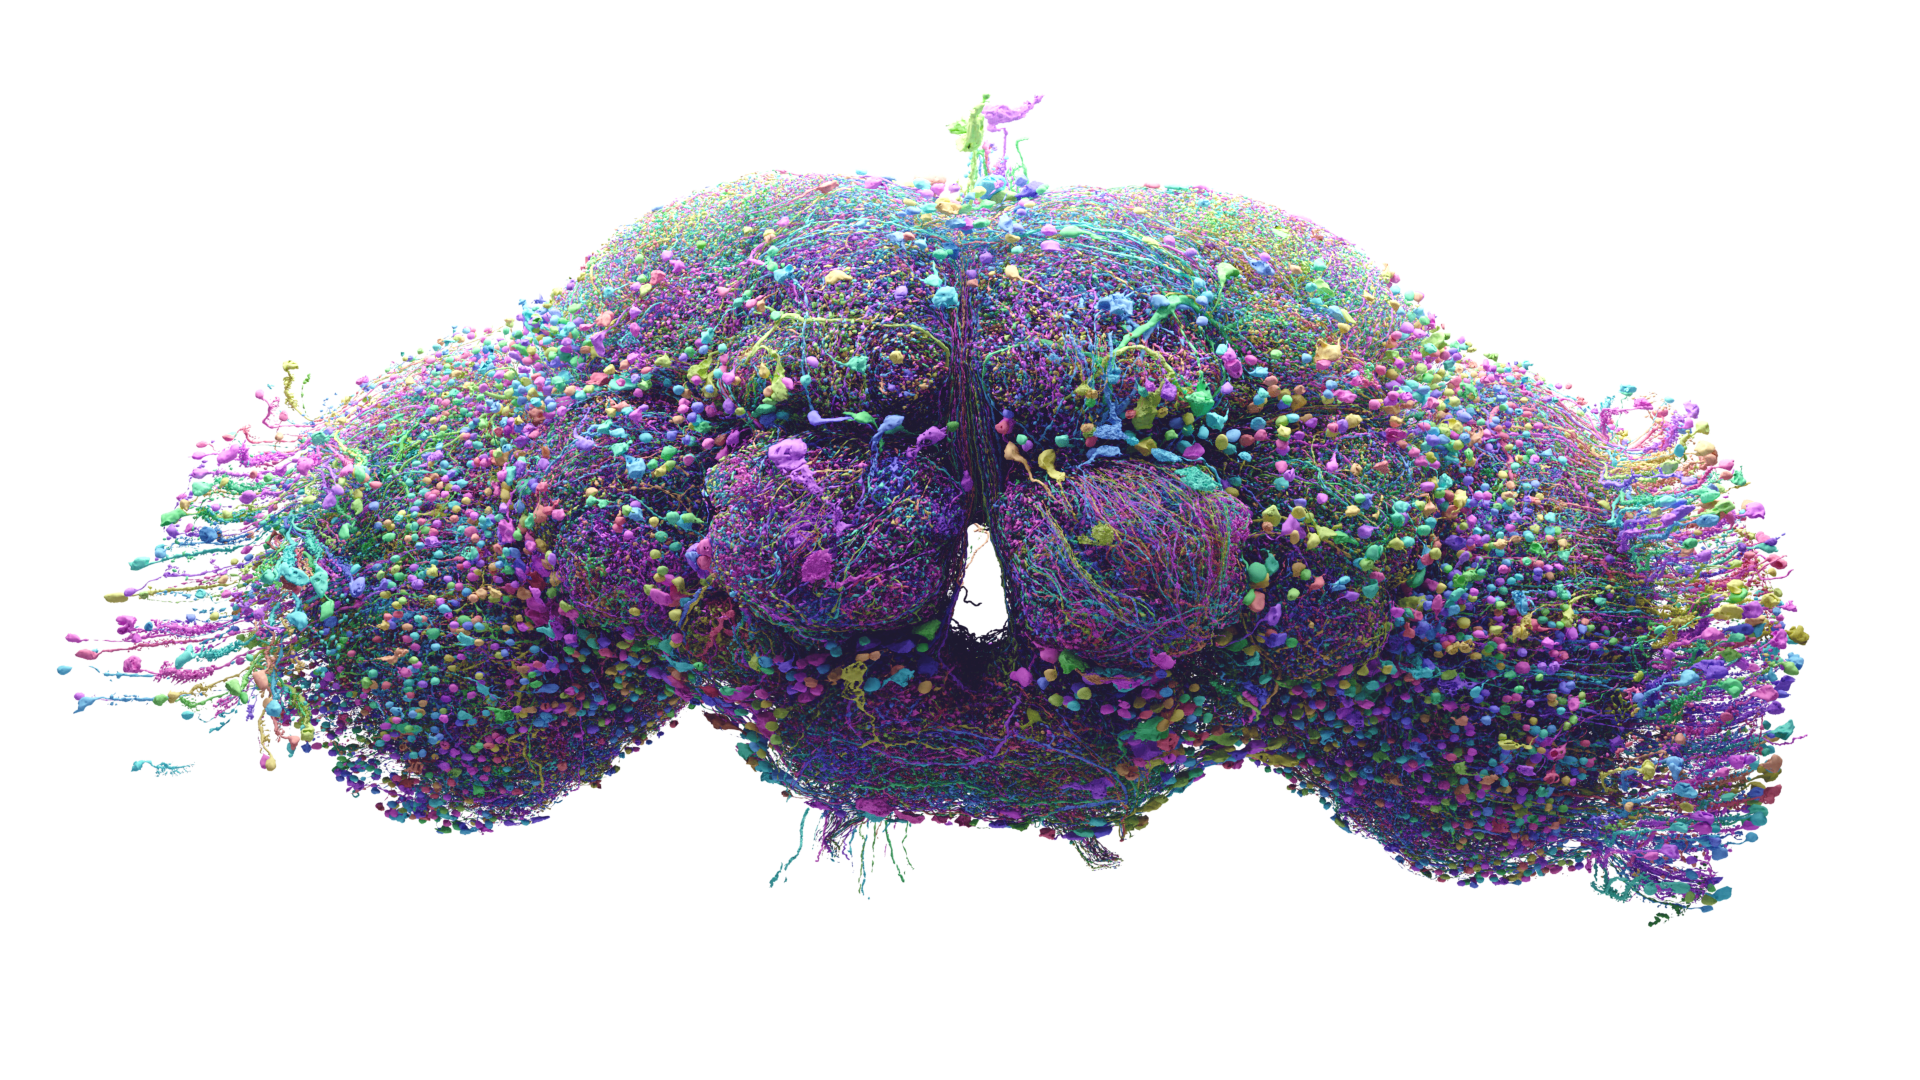
Welcome to FlyWire, a community connectomics project that has mapped the entire adult Drosophila melanogaster (fruit fly) brain! For more information, see flywire.ai.
Release 630 is the default view in FlyWire and contains reconstructions of the 127,978 neurons that were proofread in the Connectome publication <bioRxiv>. 72,403 (56%) of these cells have been typed or labeled by the Drosophila community; annotation is ongoing. New annotations are updated immediately in Codex (Connectome Data Explorer). Proofreading is still accepted from users who have gained edit access to the production dataset. Changes to segmentation will be included in future release versions.
Read below for a walk through the complete FlyWire interface.
FlyWire Interface and Editing
Interface Overview
Before we begin looking at cells, it’s important to get acquainted with the FlyWire interface.
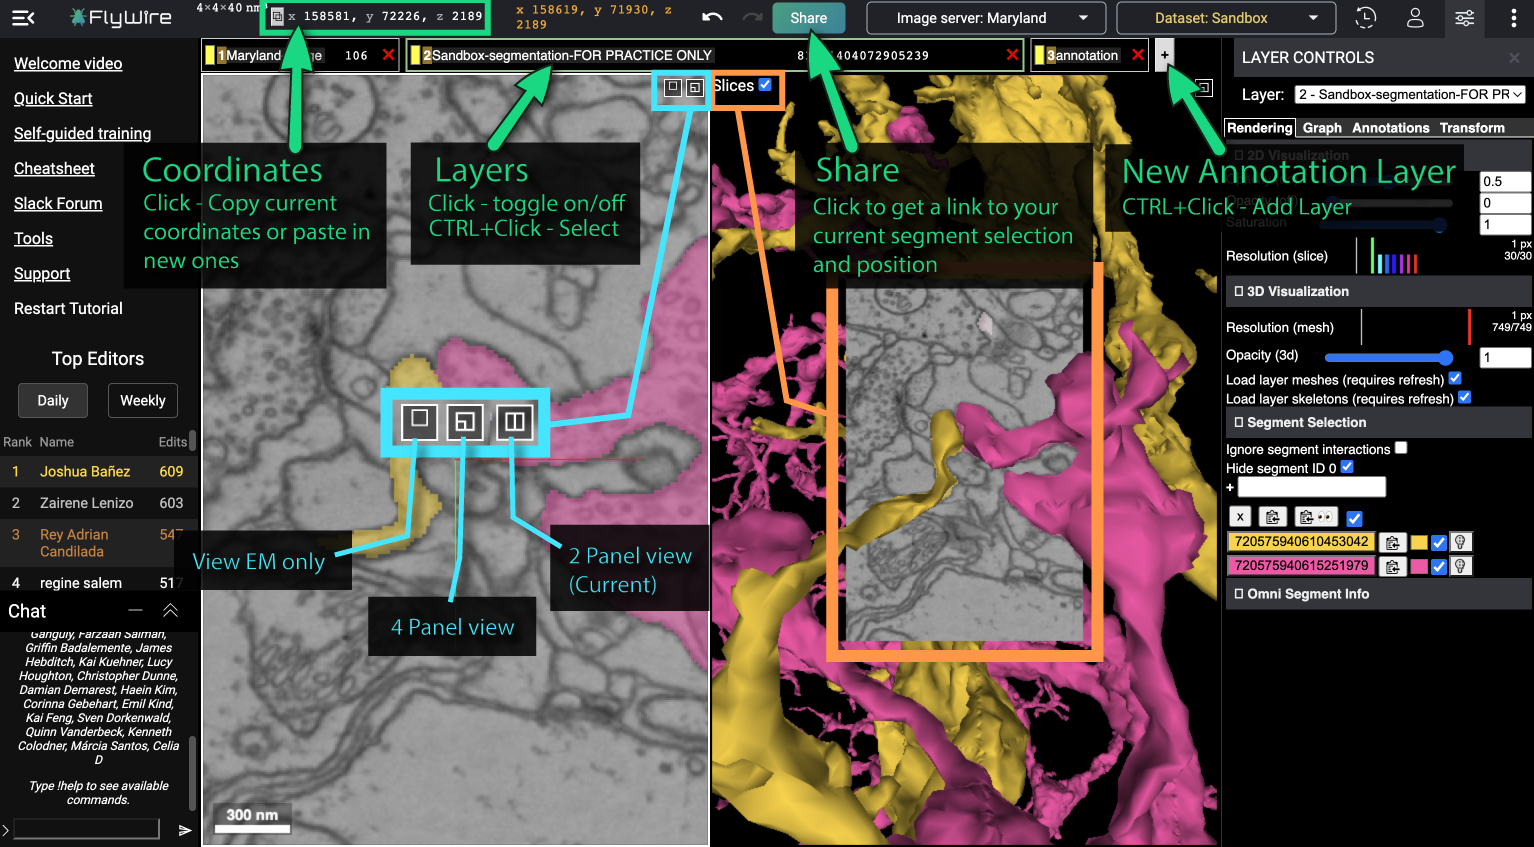
We’ll start by highlighting a few areas of the interface you’ll need to use frequently, and some which will improve your proofreading experience.
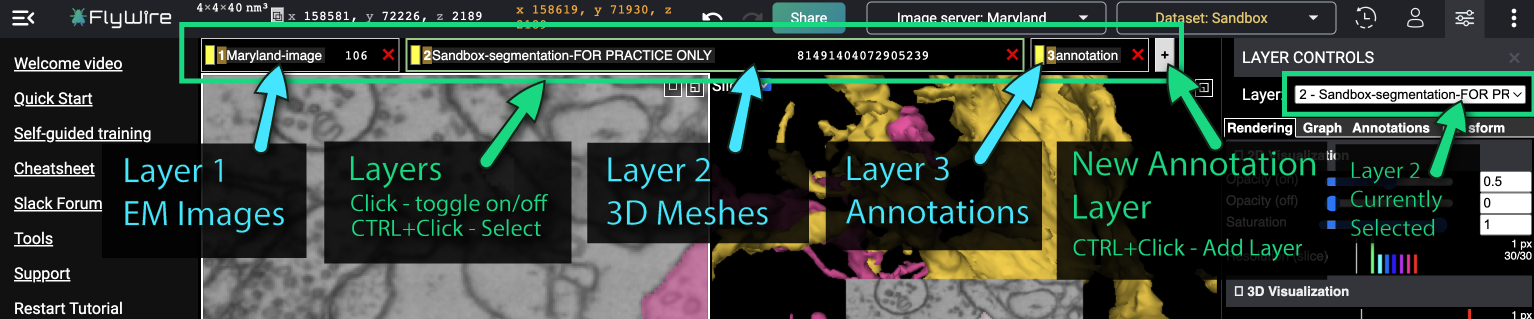
Let’s take a closer look at just the layers, which sit at the top of the screen. Each layer can have its visibility toggled on or off, and each has a different set of tools associated with it. You will mainly be working in Layer 2, the 3D segmentation layer.
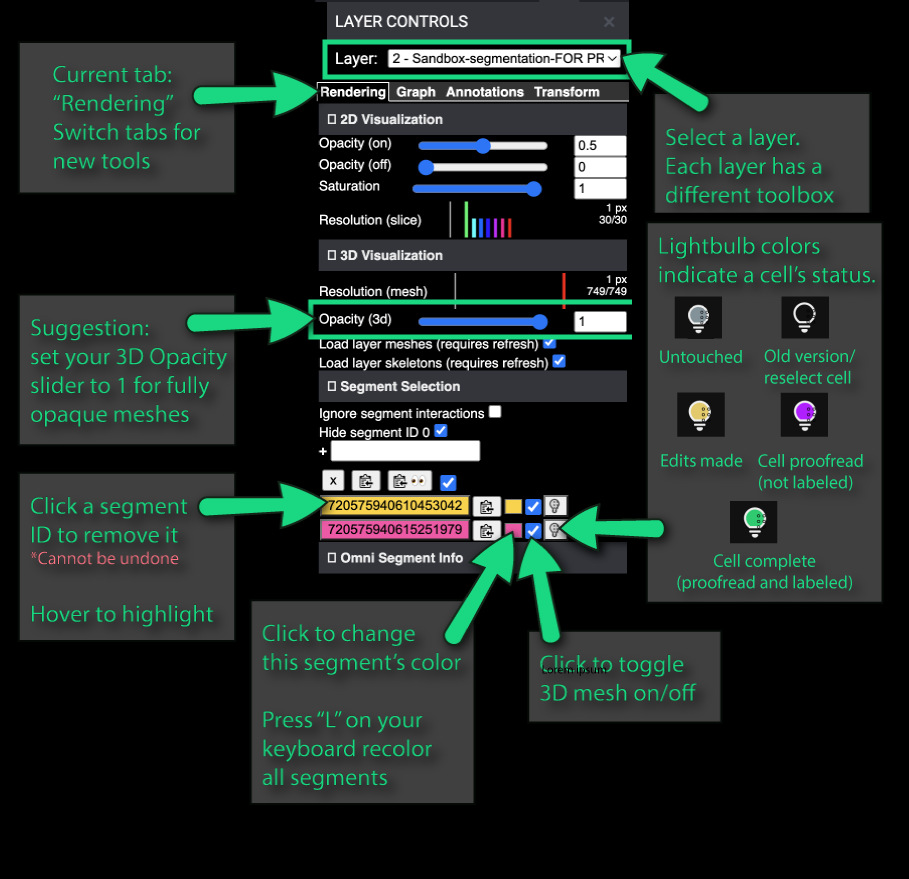
Now we’ll zoom in on the “Layer Controls” panel, seen on the right side of the screen. If you do not see this panel, you will need to select a layer with CTRL+Click or right-click.
Many of the Layer Controls are not used frequently, or at all. Let’s take a look at just the ones that are necessary or useful.
Here’s a closer look at the Rendering toolbox in the 3D Segmentation layer (Layer 2).
Hopefully you now feel a little more comfortable navigating in FlyWire. We’ll take a look at some additional layer tools later on.
Sharing
One of your most important interface tools is the Share button. This will give you a link to your current work in its current state.
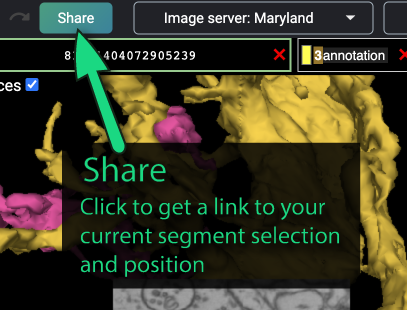
It will link to your current coordinates, show all segments currently selected, and give a snapshot of how your segments look at the point in time when you share, even if they change later on. Think of the Share button like an interactive screenshot.
Please use Share any time time you are linking to your work, and NOT a copypaste of the FlyWire URL. You may find it helpful to paste the Share link in the Q&A Log if you’re confused by something in your cell but you need to pause your FlyWire activities before you can get a real-time answer about it.
Working with FlyWire controls
Now that we’re better acquainted with the interface, let’s move on to the FlyWire controls. If you’ve played Eyewire before the cell models and EM images will look familiar to you, but the basic controls are a bit different. Let’s learn them now.
Select a neuron
You can’t do any proofreading without a neuron! Double click in the 2D to add a neuron, double click in either 2D or 3D to remove.
Move Through 3D Space
When your mouse is hovered over the 3D area, use these controls to manipulate the 3D model.
Move Through 2D Space
When working with the 2D EM images, the following controls will help you maneuver across and through slices.
Undo
If you accidentally delete a segment, or click to the wrong position, you can use Undo to reverse the issue. Please note that Undo does NOT work for reversing splits or merges.
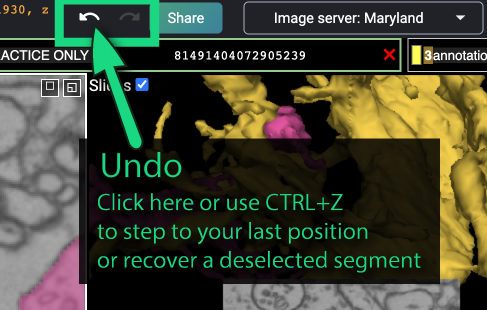
Use CTRL+Z or click the back arrow at the top of the screen to Undo.
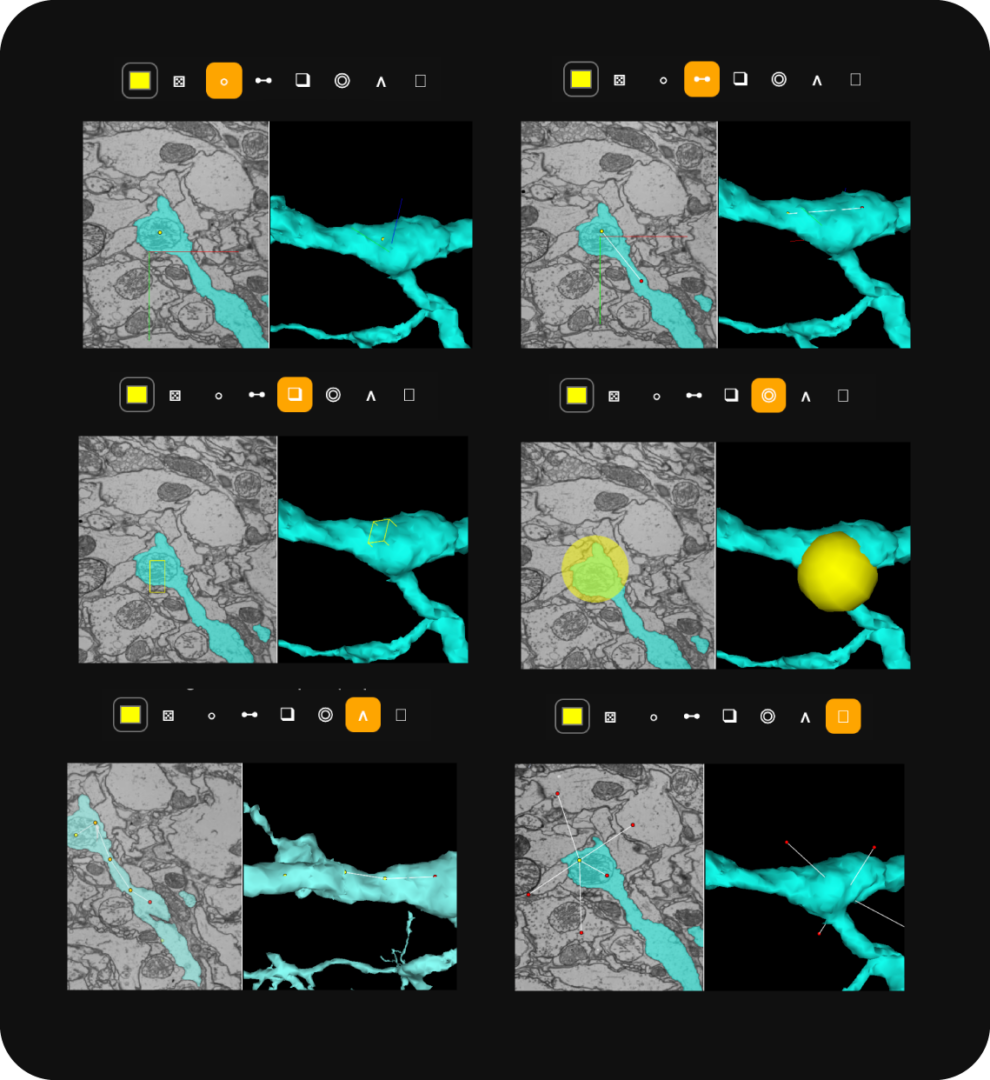
Annotations
Utilize annotations to help you mark whole cells, pieces of cells, or flows between cells that you’d like to track.
You may want to use annotations to track your progress, to follow an unruly branch or merger break, or to share information with other FlyWire users. Annotations can be placed along both the 2D and the 3D.
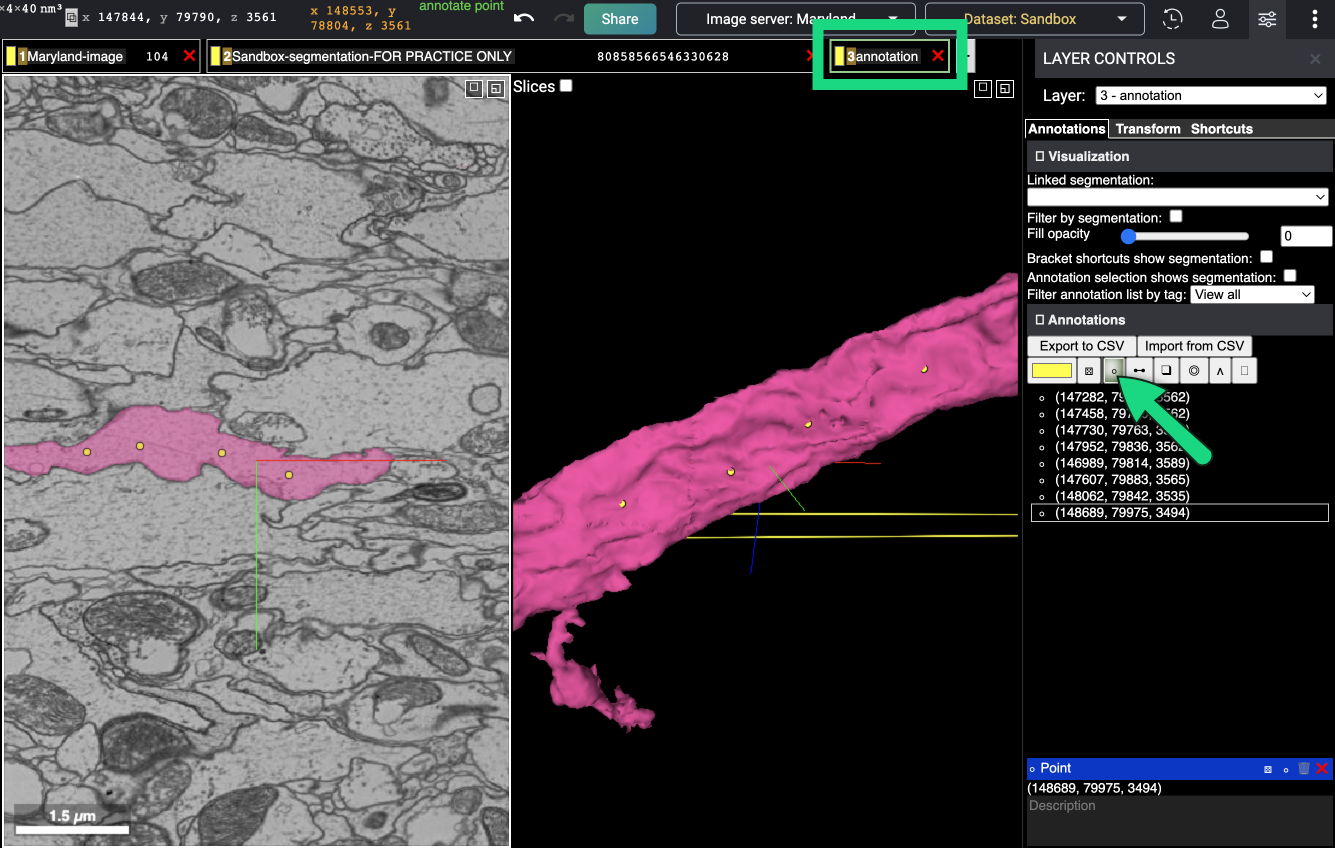
There are many different types of annotations available, but the most used one is the single point annotation (shown in the image above). We suggest using this one when starting out in FlyWire.
To begin annotating, you must first add an annotation layer. Right click the + button next to your last visible layer to enable a new annotation layer (see reference image at the beginning of this section).
With annotations you can add notes to each annotation created, and change annotation colors (only one color per layer).
Annotation types:
Cell Morphology
Cells in FlyWire can vary wildly from one another. You may be wondering, is my cell complete yet? Why is it taking a sudden left turn? These are some strange looking dendrites!
It’s always helpful to have a reference to compare your work against! Currently our production dataset for FlyWire players concerns the optic lobe. We’ve got examples of these types of cells here!

Additional 3D views of some cell types here.
Proofreading
In most cases you will be analyzing completed cells, but if you need to make edits to a cell, the following section will show you how. You can also contact someone from the FlyWire team if you are not comfortable with or do not have time to edit, and would like assistance updating your cells of interest.
Merging and Splitting
The most important tools you’ll need for proofreading are merging and splitting.
Segments in FlyWire are made up of many smaller units called “supervoxels.” The AI has already fused many of these supervoxels together! If you click on any given one in the 2D, a large, often mostly complete neuron will materialize.
The AI gets it right a lot of the time, but it’s not perfect. If you find a neuron that is incomplete, or fused with other objects, you can take the following actions to make improvements to its mesh.
Merging
Let’s start with merging, the easier of these two processes. You’ll use this to add an extension to a truncated neuron branch.
To begin merging, both your original neuron and the branch you are trying to fuse to it must be visible. To start the merge pres the “M” key on your keyboard. An alert at the bottom of the screen will confirm that you have entered merge mode. Now simply click on the end of the unfinished cell branch, and then click close by on the segment you would like to fuse with it.
Now we wait for FlyWire to work its magic.
Unfortunately FlyWire seems versed in some dark magic, because after every merge or split a black box appears around your work area. Refresh the page and your cell will arise from the darkness, hopefully with your segments merged together! Huzzah!
Splitting
Splitting can be a trickier process in FlyWire. Segments usually piece together easily, but sometimes they are a little upset when you try to remove them. Let’s go over two splitting methods that will help you get the job done.
Simple Split (C)
Although the easier of the two methods, this one is less commonly used in FlyWire. Many mergers are complex and attached at multiple points along the cell. They need something more robust than a simple split.
But when you come across a nice merger that just touches its cell pal in a single spot, that’s a job for the simple split!
To begin the split press the C key to enter split mode. An alert at the bottom of the screen will confirm this for you. Next, simply click on one side of the merge point, and then on the other. Time to wait!
The black box will greet you once more. Refresh to bring back your cell, hopefully with your merger detached! Hooray!
Multi-Cut Split
For the more common, nastier mergers, you’ll need a more sophisticated tool to get rid of them. That tool is multi-cut split!
One of the biggest hurdles when using this tool is just finding it in the first place! To access multi-cut click on Layer 2 (the segmentation layer) at the top of the screen, then click the “Graph” tab under the layer control panel to the right of the screen. Multi-cut will be waiting there for you!
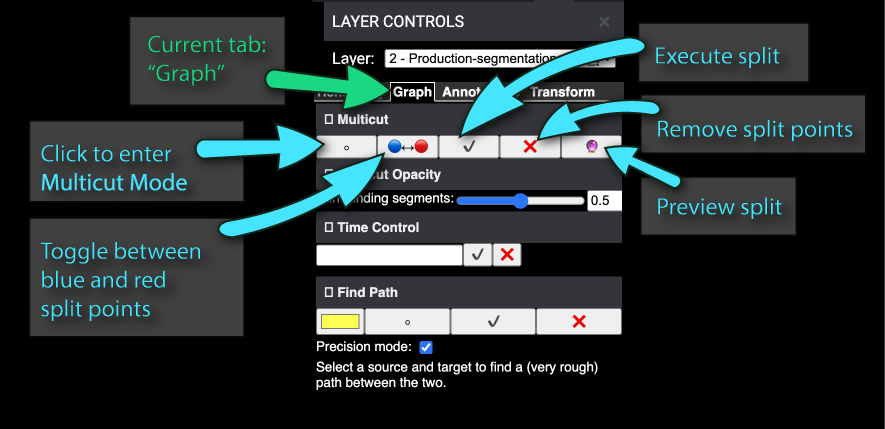
To begin your cut click the “set split point” button, which looks like “o.” You can hover over the buttons if you don’t remember their functions to view their tool tips.
Now you can begin placing points in red. Scroll to near where the merge begins, and CTRL+click to place your first point in the 2D. While you can place split points in 3D, it is highly recommended to place split points in 2D to prevent any accidental overlapping split points.
Place a number of points onto this side of the merge, to help the splitter accurately differentiate between the segments. You can scroll through the slices and place additional points. Generally it’s good to place at least 3 points per side in a small merger, and more in a larger merger.
*Note* Check that selected supervoxels do NOT span the merge gap, make sure to scroll through the EM!
Next you will click the “Toggle multi-cut group” button which looks like “🔵↔🔴.” If you hover over the 2D, you will see that your point selection has changed to blue. CTRL+click to add blue dots to the unmarked side of the merged area.
Once you are satisfied with the placement of your split points, you can begin your split!
*Note* if you are not totally confident in your split, the “Split Preview” button “🔮” is there to assist! It will show you how your split will look in the 2D before you commit.
Click the “Perform multi-cut” button “✔️” to complete the split. You will get the famous black box, and do a refresh. Hopefully your split will complete as desired! Click the “Abort multi-cut” button “❌” to remove your split points.
Hot tips 🔥
-Multicut points can be placed in either 2D or 3D. If your branch and merger are clearly defined, placing 3D points might be your best bet. If they are more intertwined placing in 2D is probably the move. You can experiment to see what works best for you!
-It doesn’t matter which side of the merger the blue or red points go on, or which are placed first. It just matters that the colors are separated from each other.
Find Path
Another tool in your FlyWire arsenal that you will find very useful is “Find Path.”

If you’ve played Eyewire previously, you will be used to using the Highlight tool to find your way through complex cells.
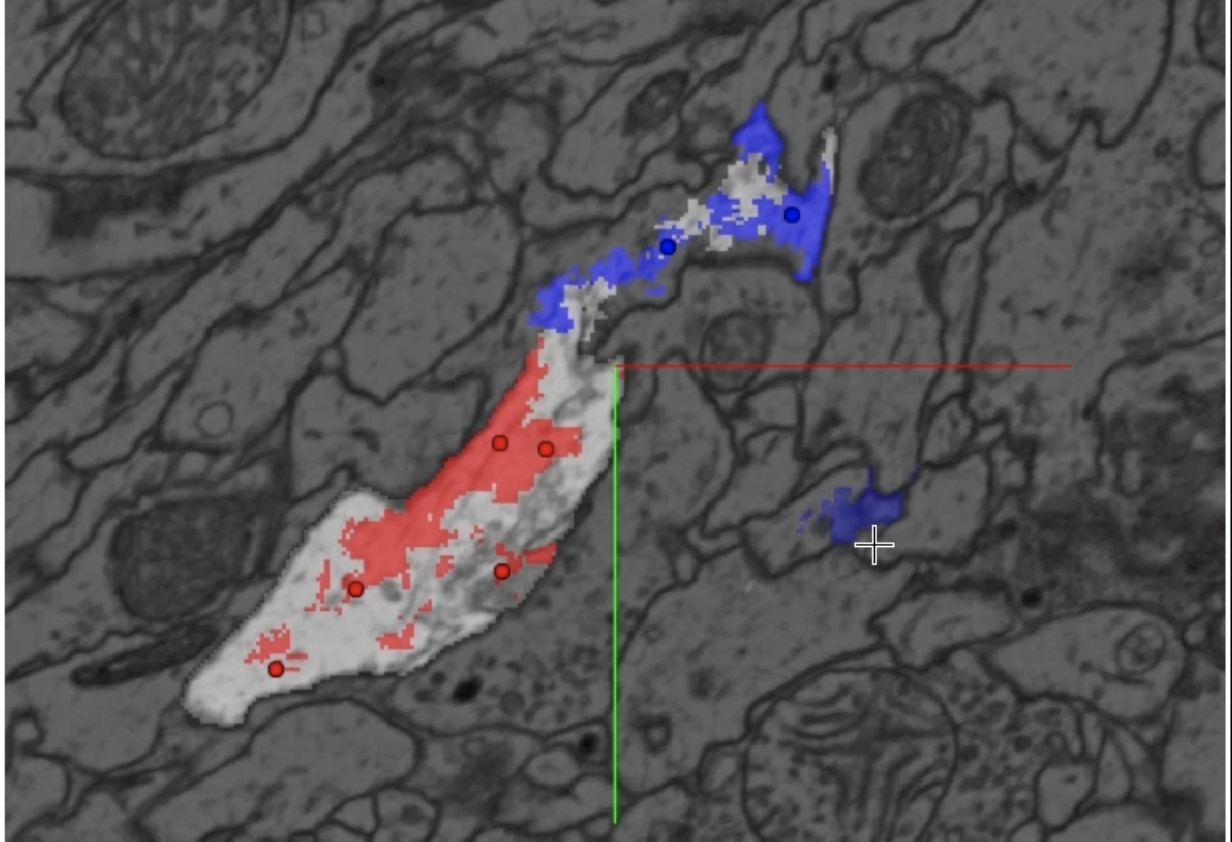
“Find Path,” serves a similar function. This tool allows you to place two points on your neuron, then traces a path between them.
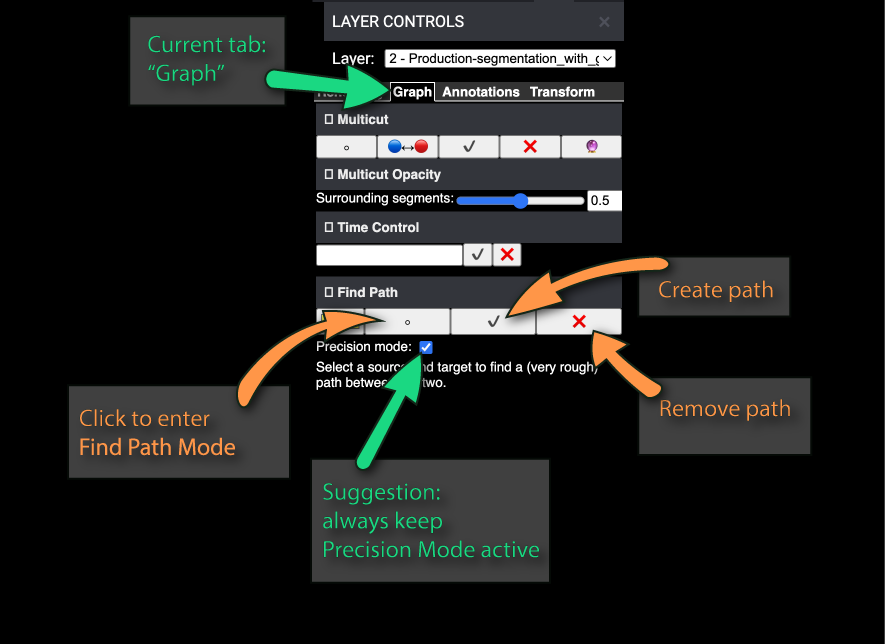
To begin creating your path, click the “o” button. Be sure that Precision Mode is active to get an accurate path.
Next click on a known good part of your cell. Then click on a branch of the suspected merger.
Click the “Create Path” button “✔️” to activate the path. You may have to wait a few moments depending on how complex the path is.
Now follow the path visually until you find the area where you suspect the merger begins.
Please note that the path tool is not 100% perfect, and may not flow directly through the center of a cell branch. But it should give an approximate idea of how two points on your segment connect.
Once you are finished utilizing your path you can remove it using the “Remove Path” button “❌.”
For Science!
Thank you citizen scientists for your help on this pioneering scientific adventure! You’re contributing to a very important scientific milestone, and we are extremely pleased you’ve decided to join us. For fun, for collaborative open-source projects, for science!
Once you have the gist of FlyWire, it’s time to submit edits for Production Access and start completing cells!